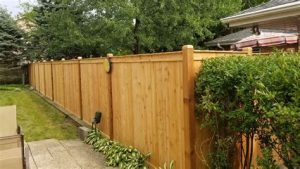
Discover essential tips for a successful DIY fence project, from planning and material selection to installation and maintenance for lasting results.Are you considering enhancing your property’s curb appeal and security with a fence? Installing a fence can feel daunting, especially for beginners. However, with proper planning and guidance, you can transform your outdoor space while saving money on labor costs. In this beginner’s guide to DIY fence installation, we’ll walk you through the essential steps to ensure your project is a success. From the initial planning stages, where you’ll map out your vision, to choosing the right materials that suit your style and budget, we’ll cover everything you need to know. You’ll also learn how to prepare the area effectively, build a durable fence structure, and add those all-important finishing touches for a polished look. Let’s embark on this rewarding journey toward creating the perfect enclosure for your home!
Planning Your DIY Fence Project
When embarking on a DIY fence project, careful planning is essential to ensure a successful outcome. The first step is to clearly define the purpose of your fence. Are you looking for privacy, security, or simply to mark your property lines? Understanding your needs will help guide your choices throughout the process.
Next, it’s important to research local fence regulations and zoning laws. Different areas have specific guidelines regarding fence height, materials, and placement. Checking with your local authorities will prevent any potential legal issues down the line.
Another critical aspect of planning is deciding on the design and aesthetic of your fence. Whether you opt for a traditional wooden picket fence or a modern metal design, considering how the fence will complement your home and landscape is key. You may find it helpful to create a rough sketch of your vision, which can serve as a guideline during the installation.
| Step | Action |
|---|---|
| 1 | Define the purpose of your fence |
| 2 | Check local regulations |
| 3 | Choose materials and design |
| 4 | Create a project timeline |
Finally, don’t forget to establish a budget. This will help you allocate funds for materials, tools, and any unexpected expenses that may arise during your project. By planning meticulously, you can create a beautiful and functional fence that enhances your property.
Choosing the Right Materials
When it comes to DIY fence installation, selecting the right materials is crucial for ensuring durability and aesthetic appeal. The variety of materials available can accommodate various budgets, designs, and purposes. Below, we will explore some popular fencing materials, their benefits, and considerations for choosing the right one for your project.
Wood is a traditional choice for fencing and offers a natural look that blends well with most landscapes. It is relatively easy to work with and can be customized in terms of height and style. However, it requires regular maintenance due to susceptibility to rot and insect damage. Common wood types used for fences include cedar, pine, and redwood.
Another option is vinyl fencing, which has become increasingly popular due to its low maintenance requirements and variety of colors and styles. Unlike wood, vinyl does not require staining or painting, making it a cost-effective choice over the long term. However, it can be more expensive upfront compared to traditional wood fences.
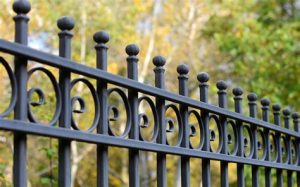
For those seeking a robust solution, metal fencing such as chain link or wrought iron provides high durability and security. Metal fences can withstand severe weather conditions and are often used in commercial settings. Chain link fencing is cost-effective and practical, whereas wrought iron adds an elegant touch but may require professional installation.
| Material | Pros | Cons |
|---|---|---|
| Wood | Natural appearance, customizable | Requires maintenance, susceptible to rot |
| Vinyl | Low maintenance, various styles | Higher upfront cost |
| Metal | Durability, security | Can be expensive, limited aesthetic options |
In summary, the choice of fencing material largely depends on your specific needs, budget, and desired aesthetic. Consider factors like climate, local wildlife, and the primary purpose of the fence (for privacy, security, or decoration) when making your decision. Opting for high-quality materials will not only enhance the look of your property but also ensure that your fence stands the test of time.
Preparing the Area for Installation
Before embarking on your DIY fence installation, it’s crucial to invest the time in preparing the area for installation. Proper preparation helps ensure that your fence will be both sturdy and aesthetically pleasing.
- Check local regulations: Before starting your project, consult with local zoning laws and homeowners’ association rules to determine any restrictions related to fence height, style, and placement.
- Define the fence line: Use stakes or spray paint to mark the planned line of your fence. This will give you a clear visual guide and help you see where the posts will go.
- Clear the area: Remove any plants, rocks, or debris from the proposed fence line. Make sure the area is clean and free of any obstacles that could hinder installation.
- Identify underground utilities: Always call your local utility companies to mark the location of underground lines, including water, gas, and electricity. This will prevent accidental damage during digging.
- Measure and plan: Measure the total length of the fence you plan to install and calculate the number of fence panels and posts you will need. Make adjustments for gates if necessary.
By following these steps, you will set a solid foundation for your fence project. A well-prepared area not only simplifies the installation process but also enhances the overall durability of your fence.
Remember, the key to a successful DIY project lies in the preparation. Take the time to ensure your area is properly set up, and you’ll find the installation process to be much smoother and more enjoyable.
As you prepare your area, keep in mind that each fence is different, and adjustments may need to be made based on the specific characteristics of your property. Stay flexible, and approach the task with a positive mindset!
Building a Sturdy Fence Structure
When it comes to DIY fence installation, one of the most crucial steps is building a sturdy fence structure. A well-built fence not only enhances the aesthetic appeal of your property but also provides the necessary security and privacy. During this phase, it’s essential to pay attention to the materials and construction techniques used to ensure durability and longevity.
To begin, you should select the right type of posts to suit your fence. Generally, wooden or metal posts are favored for their strength. For optimal results, concrete footings are often recommended to anchor the posts firmly in the ground.
| Material | Durability | Cost |
|---|---|---|
| Wood | Moderate | Low |
| Vinyl | High | Medium |
| Metal | Very High | High |
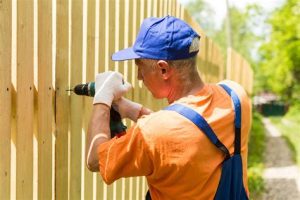
After the posts are installed securely, attach the horizontal rails. Using screws instead of nails will provide better stability and hold. Ensure that your rails are level and properly spaced according to your fence design. Once the structure is in place, start attaching the fence panels or boards. Make sure to leave adequate space between them for ventilation and to prevent rot, especially in wooden fences.
Adding Finishing Touches and Maintenance
Once you’ve successfully constructed your DIY fence, the finishing touches and maintenance become crucial to ensure the longevity and aesthetic appeal of your project.
1. Painting or Staining: To enhance the appearance of your fence and protect it from the elements, consider applying a coat of paint or stain. This not only adds a decorative touch but also provides a barrier against weathering. Be sure to choose a product that is suitable for outdoor use, and allow ample drying time.
2. Fasteners and Hardware Inspection: Regularly check the fasteners and hardware used in your fence structure. Over time, screws, hinges, and latches can loosen due to movement or wear. Tightening or replacing any damaged components will help maintain the integrity of your fence.
3. Cleaning and Repairs: Keeping your fence clean is essential for its maintenance. A simple wash with soap and water can remove dirt and debris. Additionally, inspect for any broken or rotting panels and replace them promptly to avoid further damage.
4. Landscaping Considerations: It’s important to consider how landscaping around your fence can affect its durability. Keep plants trimmed back to prevent them from touching the fence. Overgrown vegetation can lead to moisture buildup and rot.
Investing time in these finishing touches and committing to regular maintenance will ensure your DIY fence remains a beautiful and functional addition to your property for years to come.
Frequently Asked Questions
What materials do I need for a DIY fence installation?
You’ll need fence panels, posts, concrete for securing posts, nails or screws, tools like a saw, hammer, level, and a post hole digger.
How deep should I dig the post holes for a fence?
Typically, post holes should be about one-third the height of the fence, generally 2 to 3 feet deep.
What type of fence is best for beginners?
A picket or panel fence is often recommended for beginners due to its simpler installation process.
Do I need a permit to install a fence?
It depends on local regulations. Always check with your local building department to see if a permit is required.
How do I ensure my fence is level?
Use a level as you set the posts, and regularly check during installation to maintain a straight and even top line.
What is the best way to maintain my DIY fence?
Regularly clean the fence, check for any loose boards or nails, and apply a wood preservative or stain as needed.
Can I install a fence in rocky soil?
Yes, but it may require additional tools like a rock auger or digging bar to make post holes easier.
