Discover essential steps for successful fence installation, including navigating local regulations, choosing materials, assessing property boundaries, and finishing touches for a professional look.Installing your own fence can be a rewarding DIY project that enhances the beauty and security of your property. However, before taking the plunge, it’s important to understand the key considerations involved in the process. From navigating local regulations and zoning laws to selecting the right materials that suit both your aesthetic and budget, there’s much to learn. Accurately assessing property boundaries is crucial to avoid disputes with neighbors, while proper techniques for digging post holes and setting posts can significantly affect the fence’s longevity and durability. Finally, the finishing touches will ensure that your new fence not only serves its purpose but also complements your home. In this blog post, we’ll address these common questions and guide you through the essential steps of a successful fence installation. Let’s get started!
Understanding local regulations
Before embarking on any fencing project, it’s crucial to understand local regulations that may govern the installation of fences in your area. Regulations can vary significantly depending on your locality, so it’s essential to familiarize yourself with them to avoid potential fines or the need for costly adjustments down the line.
Local zoning laws often dictate aspects like the height of the fence, the materials used, and even the distance the fence must be set back from property lines. For example, some areas may allow only wooden fences up to a certain height, while others may permit taller variations or different materials. Always check with your local government or zoning office to obtain the most accurate information.
Additionally, it’s important to consider if your property is part of a homeowners association (HOA), as they may have specific regulations that differ from city or county laws. In some cases, the HOA might require a review or approval process before any fencing work begins. Understanding these rules can save you time and frustration during the installation process.
Selecting the right materials
When it comes to installing a fence, the choice of materials is crucial. The right materials not only affect the overall appearance of your fence but also its durability and maintenance needs.
| Material | Durability | Maintenance |
|---|---|---|
| Wood | Moderate | Requires regular staining or painting |
| Vinyl | High | Very low maintenance |
| Chain Link | High | Minimal maintenance; rust concerns |
| Metal (Aluminum or Steel) | Very High | Low maintenance; may require painting |
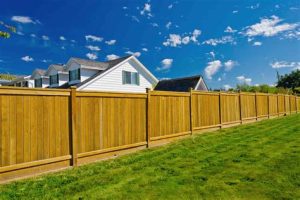
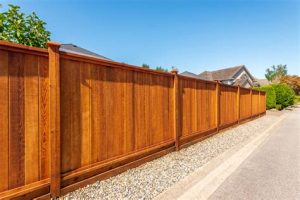
Each of these materials brings its own set of advantages and disadvantages. Wood is often chosen for its traditional look and warmth, but it tends to require more maintenance to prevent rot and decay. On the other hand, vinyl fences are highly durable and resist weathering, making them a great option for homeowners looking for low maintenance solutions.
For those on a tighter budget, chain link fences are an economical choice, providing security without breaking the bank. However, they lack the aesthetic appeal of wood or vinyl. If you’re looking for a modern and sleek option, metal fencing—either aluminum or steel—offers excellent durability and requires minimal upkeep.
Ultimately, selecting the right materials for your fence involves considering your budget, maintenance preferences, and the specific purpose of the fence.
Assessing property boundaries accurately
When planning to install your own fence, one of the most crucial steps is assessing property boundaries accurately. Incorrectly determining where your property begins and ends can lead to disputes with neighbors and potential legal complications. Begin by reviewing your property deed, which often contains detailed descriptions and specific measurements of your land.
Utilizing a surveyor to mark your boundaries is another effective method. They use professional-grade tools to ensure precision, which can save you time and trouble in the long run. It’s essential not just to rely on visual landmarks, as these can be misleading and prone to change.
Once you have a clear understanding of your boundary lines, it’s advisable to document the findings, possibly even with photos or sketches. This documentation can be helpful if conflicts arise in the future, ensuring that you have a clear representation of your fence placement in relation to your property.
Total adherence to property boundaries not only prevents disputes but also helps maintain a good relationship with your neighbors. Remember, an accurate assessment is foundational in the process of installing your fence, providing you with the peace of mind to proceed with confidence.
Digging post holes and setting posts
When it comes to installing your own fence, digging post holes and setting posts is one of the most crucial steps in the process. Proper post installation ensures the integrity and longevity of your fence, so it’s essential to get this right. Here are some common questions and answers regarding this important task.
1. How deep should I dig my post holes? The depth of your holes largely depends on the height of the fence. A general rule of thumb is to bury about one-third of the post’s length. For example, if you are installing a 6-foot fence, you would typically dig holes that are at least 2 feet deep.
2. What tools do I need for digging post holes? To dig post holes effectively, you will need a few tools: a power auger or a manual post hole digger, a level, and a measuring tape. If the soil is particularly hard or rocky, having a digging bar handy can also be beneficial.
3. How do I ensure my posts are straight and level? After placing the post in the hole, use a level to check that it is vertical. You can adjust the post by adding or removing soil as needed. Once the post is straight, backfill the hole with concrete or soil, ensuring the post remains level throughout the process.
Following these guidelines will help you achieve a sturdy and lasting fence that meets your needs. Remember, doing it right the first time will save you time and money in the long run!
Attaching panels and finishing touches
Once you have completed the installation of your fence posts and dug the necessary post holes, the next step is to attach the panels. This process is essential for ensuring that your fence is not only aesthetically pleasing but also durable and secure.
To begin with, gather the appropriate materials, including panels, screws, and brackets. Make sure that your panels are suitable for the type of fence you are installing, whether it’s wooden, vinyl, or chain link. Choosing the right fasteners is also important; ensure they are designed to withstand the elements and will keep your panels firmly in place.
When attaching the panels, start from one end and work your way down to the other, adjusting for height and leveling as you go. Use a level to ensure that your panels are straight and evenly aligned. After securing all the panels, it’s time to add the finishing touches. This may include trimming, adding caps to the posts, or applying a protective coating to wooden fences. These post-installation details will help enhance the appearance and longevity of your fence.
Frequently Asked Questions
What are the benefits of installing my own fence?
Installing your own fence can save you money on labor costs, give you a sense of accomplishment, and allow you to have complete control over the design and materials used.
What tools do I need to install my own fence?
Basic tools you may need include a post hole digger, level, measuring tape, hammer, saw, and power drill. Additional tools may be required depending on the type of fence you choose.
Do I need a permit to install my own fence?
In many areas, you will need a permit to install a fence. It’s important to check with your local building department to ensure compliance with regulations and zoning laws.
How do I choose the right materials for my fence?
Consider factors such as your budget, the climate in your area, the purpose of the fence (privacy, security, aesthetic), and the maintenance requirements of different materials.
What is the best way to mark where the fence will go?
Using stakes and string to outline your fence line is a practical way to visualize the layout. Be sure to follow property lines and mark out any obstacles.
How deep should I dig post holes for a fence?
A good rule of thumb is to dig post holes one-third of the height of the fence above ground. For example, for a 6-foot fence, dig holes approximately 2 feet deep.
What are some common mistakes to avoid when installing a fence?
Common mistakes include neglecting to check local regulations, failing to mark utility lines, not planning for proper drainage, and inadequate post hole depth.


