DIY Fence Installation: What You Need To Know
Learn how to install a fence with our comprehensive guide covering design choices, preparation, installation steps, and maintenance tips for lasting results.When it comes to enhancing your property’s privacy, security, and aesthetic appeal, installing a DIY fence is a rewarding project that can elevate your outdoor space. Whether you’re looking to create boundaries, keep pets safe, or add a decorative touch to your landscape, understanding the essential components of fence installation is crucial. This guide will walk you through each stage of the process, from choosing the right fence design that suits your home’s style to gathering all the necessary tools and materials. We’ll also cover how to properly prepare the ground for installation and provide a step-by-step approach to ensure your fence stands the test of time. Lastly, we’ll touch upon the importance of maintenance and repairs to keep your DIY masterpiece looking its best for years to come. So, let’s dive in and get started on your journey to a beautiful and functional fence!
Choosing the Right Fence Design
When it comes to DIY fence installation, one of the most crucial steps is choosing the right fence design. The design of your fence will not only affect its appearance but also its functionality and durability. In this section, we’ll explore the various factors to consider while selecting a fence design that meets your needs.
First, consider the purpose of your fence. Are you looking for privacy, security, or simply a decorative element for your yard? Each purpose may lead you to a different style. For example, a tall, solid wood fence offers excellent privacy, while a wrought-iron fence can provide security without obstructing your view.
Next, think about the materials you want to use. Popular options include wood, vinyl, metal, and chain-link. Each material has its pros and cons, from price to maintenance requirements. Weigh these factors carefully to choose the one that best fits your lifestyle and budget.
Lastly, consider your local regulations and neighborhood aesthetics. Some homeowners’ associations have specific guidelines regarding fence styles and heights. Ensure your chosen design complies with local ordinances to avoid any future inconveniences.
| Material | Pros | Cons |
|---|---|---|
| Wood | Natural look, versatile | Requires maintenance, can rot |
| Vinyl | Low maintenance, durable | Higher upfront cost |
| Metal | Strong, secure | Can be more expensive, may rust |
| Chain-link | Cost-effective, easy installation | Less privacy, less decorative |
Gathering Necessary Tools and Materials
Before diving into your DIY fence installation, it’s crucial to gather all necessary tools and materials to ensure a smooth process. A well-prepared project will save you time and effort in the long run.
- Post Hole Digger: This is used to create holes for your fence posts.
- Level: Ensures that your fence is installed straight and aligns correctly.
- Tape Measure: For measuring distances between posts accurately.
- Hammer or Mallet: For driving in nail or stakes.
- Power Drill: Helpful for creating pilot holes and fastening the fence panels.
| Material | Description |
|---|---|
| Fence Posts: | This is the vertical support that holds the entire fence together. |
| Panels or Boards: | The main structure of the fence, available in various styles and materials. |
| Concrete Mix: | To secure the posts in the ground, providing stability. |
| Nails or Screws: | Fasteners to attach the fence panels to the posts. |
| Paint or Stain: | For finishing touches and protection against weather elements. |
By gathering these essential tools and materials ahead of time, you’ll set yourself up for a successful fence installation project.
Preparing the Ground for Installation
Before diving into your DIY fence installation, it’s essential to properly prepare the ground where your fence will be installed. The right preparation will ensure a stable and long-lasting fence that enhances your property’s aesthetic appeal and protects your space.
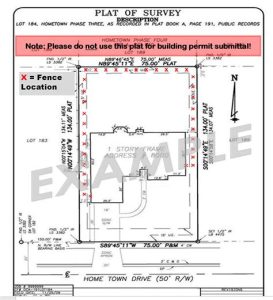
- Mark Your Fence Line: Use stakes and string to clearly define the area your fence will cover. This visual guideline will help you avoid any errors during the installation process.
- Check for Underground Utilities: Before digging, contact your local utility companies to ensure there are no underground lines in the area. This will help you avoid any hazardous situations.
- Clear the Area: Remove any weeds, rocks, and debris along the fence line. A clean work area will make it easier to dig your post holes and ensure a level fence.
- Level the Ground: Use a shovel or hoe to flatten any uneven areas. It’s crucial to have a stable, level ground for a fence that stands firm against the elements.
- Dig Post Holes: Following your marked line, begin digging post holes that are deep enough to support the height of your fence. Generally, holes should be about one-third the height of your fence.
Taking the time to prepare the ground adequately will lead to a smoother fence installation process. Remember that thorough preparation not only saves time but also ensures that your fence remains durable for years to come!
With these steps completed, you are now ready to proceed to the next part of your DIY fence project and begin the exciting installation phase!
Step-by-Step Fence Installation Process
Installing a fence can seem like a daunting task, but with the right approach and attention to detail, it can be a fulfilling DIY project. Here’s a step-by-step guide to help you through the fence installation process.
Begin by deciding where your fence will go. Use a measuring tape to determine the length and corners of the fence. Mark these points with stakes and string to visualize the layout. Ensure that you check your local regulations regarding fence heights, materials, and boundaries to avoid any future hassles.
Before digging, make sure to call your local utility company to identify any underground lines. This is crucial for your safety and to prevent damage to utilities. Once you have clearance, you can move on to the next step.
Using a post hole digger or auger, dig holes for each fence post. The holes should be about one-third the length of the posts and spaced according to local building codes, but typically 6 to 8 feet apart. Deep holes will provide a more secure foundation for your fence.
Place your fence posts into the holes and ensure they are level. Fill each hole with concrete mix or a combination of gravel and soil to secure the posts firmly in place. Allow the concrete to cure as per the manufacturer’s instructions, usually 24 to 48 hours.
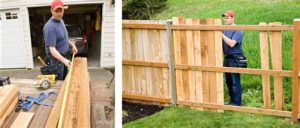
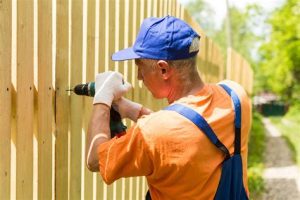
Once the posts are set, begin attaching the fence panels or boards to your posts. This can be done with screws or nails, depending on the type of fence you are installing. Ensure that each panel is level before securing it completely.
After all the panels are installed, consider applying a coat of stain or paint to protect your fence from the elements and enhance its appearance. Also, check for any sharp edges or protruding nails and fix them for safety.
Finally, clean your work area by removing any debris, leftover materials, and tools. Proper cleanup not only keeps your space tidy but also allows you to enjoy your new fence without hazards in the way.
By following these steps, you’ll ensure a successful DIY fence installation that not only meets your needs but also adds value to your property.
Maintaining and Repairing Your DIY Fence
Maintaining and repairing your DIY fence is crucial to ensure its longevity and functionality. Regular maintenance not only enhances the appearance of your fence but also prevents small issues from escalating into larger, more costly problems.
- Regular Inspections: Inspect your fence at least twice a year for signs of damage such as rot, rust, or loose boards.
- Cleaning: Clean your fence periodically using a pressure washer or a scrub brush with warm soapy water to remove dirt, algae, and mildew.
- Sealing and Staining: Apply a protective sealant or stain every couple of years to protect wood fences from moisture and UV rays.
If you notice any specific repair needs while inspecting your fence, address them promptly.
| Repair Type | Description | Tools Needed |
|---|---|---|
| Replacing Boards | Remove and replace any damaged or rotting boards. | Saw, screws, drill |
| Fixing Loose Posts | Reinforce or replace loose or leaning fence posts. | Concrete, gravel, level |
| Rust Removal | Use a wire brush and rust-inhibiting paint on metal fences. | Wire brush, paint, gloves |
In addition to the above measures, it’s essential to be mindful of your fence’s surroundings. Keep vegetation trimmed back to prevent moisture buildup and contact with wood. Furthermore, ensure that there is proper drainage around the base of your posts to prevent water from pooling.
By taking proactive measures to maintain and repair your DIY fence, you can extend its lifespan and preserve the aesthetic appeal of your property. Don’t wait for problems to arise; instead, establish a routine that includes frequent checks and timely repairs.
Frequently Asked Questions
What materials do I need for a DIY fence installation?
You’ll typically need wooden or vinyl panels, posts, concrete for securing the posts, screws or nails, a level, tape measure, and tools like a saw and a post hole digger.
How do I determine the right height for my fence?
The height of your fence will depend on local regulations and your specific needs. Generally, residential fences are between 4 to 6 feet tall, but you should check your local zoning laws.
What steps should I take before starting my fence installation?
First, check local regulations to ensure compliance. Then, plan the layout of your fence, mark the location of the posts, and call utility companies to locate underground lines.
How deep should I dig the post holes for my fence?
Post holes should generally be 1/3 of the height of the post above ground. For a 6-foot fence, this means digging holes at least 2 feet deep.
How long does it typically take to install a DIY fence?
The time required can vary based on the size of the fence and your experience level, but most DIY fence installations take between 1 to 2 days.
What tips can help ensure a straight fence line?
To maintain a straight line, use a string line tied between the end posts, or use stakes to mark the position of each post before digging the holes.
How can I maintain my fence once it’s installed?
Regular maintenance includes inspecting for damage, cleaning off dirt and debris, applying stain or sealant if it’s wood, and checking for loose or rusted hardware.


