Learn how to build a fence with expert tips on materials, measuring, digging, setting posts, and attaching panels for a strong, durable structure.Are you looking to add some privacy or enhance the beauty of your yard with a fence, but want to tackle the project on your own? Installing a fence doesn’t have to be a daunting task reserved for professionals. With the right materials, a bit of planning, and some basic tools, you can successfully create a sturdy and attractive boundary for your property. Whether you’re aiming for a classic picket fence, a durable vinyl option, or a rustic wood design, this guide will walk you through the easy steps to install a fence by yourself. From selecting the best materials for your needs to properly measuring, digging, and assembling, this blog post will provide you with practical advice and tips to make your DIY fencing project a breeze. Let’s get started on transforming your outdoor space!
Choosing the Right Materials
When it comes to installing a fence, choosing the right materials is crucial. The wrong material can lead to increased maintenance, instability, and a lack of durability.
- Wood – A classic choice, wood fences offer natural beauty and can be customized easily. However, they require regular maintenance like staining and sealing to prevent decay.
- Vinyl – Known for its longevity and low maintenance, vinyl fences come in various colors and styles. They won’t warp or rot, making them a great investment.
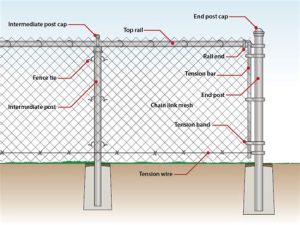
- Chain Link – This material is cost-effective and provides a secure option for property boundaries. While not visually appealing, it offers durability and low maintenance.
- Composite – Combining wood fibers and plastic, composite fences provide the aesthetics of wood without the extensive upkeep. They are resistant to fading and insects.
As you examine these options, consider factors such as cost, environment, and the aesthetic you wish to achieve. For example, if you live in an area with extreme weather, it may be best to opt for materials like vinyl or composite that can withstand harsh conditions.
Another important aspect is taking into account how much maintenance you’re willing to commit to. If you prefer a low-maintenance solution, materials like vinyl or chain link may suit your lifestyle better.
Ultimately, make sure to choose materials that not only fit your budget but also your personal style and the requirements of your property. A well-chosen fence will enhance your home’s value and curb appeal.
Measuring and Planning
When it comes to installing a fence by yourself, measuring and planning are two of the most crucial steps. A well-planned fence will not only enhance the aesthetics of your property but also ensure its functionality and longevity.
Begin by determining the fence line. Walk around your property and visualize where the fence will go. Use stakes or garden markers to outline the fence boundary. This will provide you with a good visual sense of the layout and help you make adjustments as needed. Once you have outlined the area, it’s time to take some measurements.
Next, accurately measure the distance between the stakes. Keep in mind the optimal spacing for your fence posts, which is typically 6 to 8 feet apart, depending on the type of fence you are installing. It’s important to ensure that your measurements are consistent so that each section of your fence will be even when you start installing the panels or boards.
| Section | Post Distance (ft) | Total Length (ft) |
|---|---|---|
| Section 1 | 8 | 48 |
| Section 2 | 8 | 64 |
| Section 3 | 6 | 36 |
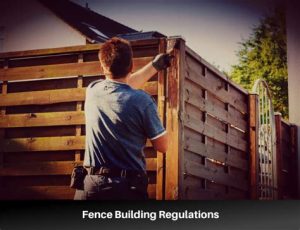
Finally, consider any local regulations and property lines before proceeding. It’s advisable to consult your local zoning office to understand height restrictions or regulations that may apply to your fence installation. With thorough measuring and planning, you’ll set the groundwork for a successful DIY fence installation.
Digging Post Holes
When it comes to installing a fence, one of the most important steps is digging post holes. This process doesn’t just support the structure of your fence; it ensures that it remains sturdy and stands the test of time. Here’s how to get it right.
First, you need to determine the depth and spacing of your post holes. Typically, the recommended depth is about one-third of the total length of the post. For example, if you have an 8-foot fence post, aim for a hole depth of around 2-3 feet. Use a post hole digger or a power auger for efficiency, especially if you’re digging multiple holes.
Once you have established the placement of your post holes, mark them clearly with spray paint or stakes. It’s crucial to keep them straight and aligned.
| Post Number | Spacing (feet) | Depth (feet) |
|---|---|---|
| 1 | 6 | 2 |
| 2 | 6 | 2 |
| 3 | 6 | 2 |
When digging, make sure to remove any roots, rocks, or debris, as these can interfere with your posts. After digging, it’s good practice to check the depth and ensure it is even across all posts.
Setting and Leveling Posts
Once you’ve completed the initial stages of choosing materials and measuring your space, the next crucial step in your DIY fence installation project is setting and leveling the posts. This step is vital because the stability and appearance of your entire fence depend on how well the posts are set. Here’s a simple guide to help you through the process.
First, begin by placing the posts in their designated holes. Use a level to ensure that each post stands straight. It’s important to temporarily brace each post using scrap wood or stakes so they remain upright during the installation phase. This ensures that they won’t shift or lean as you pour in the concrete.
Next, mix your concrete according to the manufacturer’s instructions and pour it into each post hole. Make sure the concrete is evenly surrounding the post. To check the level, remeasure using a level tool and adjust as necessary. Allow the concrete to cure for the recommended time, usually at least 24 hours, to ensure maximum stability before proceeding to the next steps in your fence installation.
| Task | Status |
|---|---|
| Place posts in holes | ✔️ |
| Check posts with level | ✔️ |
| Brace with scrap wood | ✔️ |
| Mix and pour concrete | ✔️ |
| Ensure concrete is even | ✔️ |
| Allow to cure | ✔️ |
Attaching Fence Panels or Boards
Once your fence posts are securely set and leveled, the next step is to begin attaching the fence panels or boards. This process is crucial for ensuring that your fence not only looks good but also stands strong against the elements. The method you choose for attachment depends on the type of fence you are building.
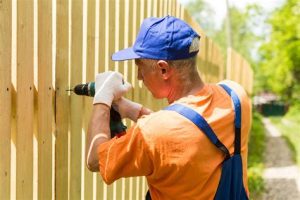
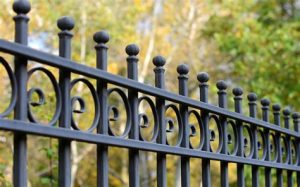
For wood panels, you can use a combination of nails and screws for a secure hold. If you’re using vinyl panels, check the manufacturer’s instructions, as they may come with specific connectors or brackets for attachment. Lastly, for metal fences, specialized clamps or brackets are often recommended.
- Start with the corners: Attach the first panel to the corner posts before moving to the adjacent panels.
- Keep it level: Use a level to ensure each panel is straight. This will ensure an even appearance throughout your fence.
- Secure firmly: Ensure that each connection is tight to avoid any wobbling; this will also help maintain the fence’s integrity over time.
By following these steps, you’ll create a durable and attractive fence that can enhance your property and provide privacy and security.
Frequently Asked Questions
What are the initial steps I should take before installing a fence?
Before installing a fence, you should check local zoning laws and regulations, select the appropriate materials, and mark the area where the fence will be installed.
How do I determine the right height and type of fence for my property?
Consider factors such as your needs for privacy, security, and aesthetics, as well as neighborhood restrictions. Measuring the height of existing fences in the area can also provide insights.
What tools do I need for a DIY fence installation?
Essential tools include a post hole digger, level, tape measure, saw, hammer, and fencing materials such as panels, posts, and fasteners.
How should I prepare the ground before installing a fence?
Clear the area of any debris, rocks, or vegetation. Make sure to dig post holes according to the depth required for your specific fence type.
What is the best way to install fence posts?
Install fence posts by positioning them in pre-dug holes and ensuring they are level before securing them with concrete or packed earth for stability.
How do I ensure my fence is straight and even?
Use a string line to measure and align each post, checking against a level instrument to keep everything straight and even as you install.
What maintenance should I consider after installing my fence?
Regularly inspect the fence for any signs of wear or damage, clean it as needed, and treat or paint any wood surfaces to protect against weather conditions.


