Discover essential fencing tools, material selection, site preparation, installation techniques, and finishing touches for a successful fencing project. Elevate your fence installation skills!When it comes to fencing installation, having the right tools at your disposal is crucial for achieving a successful and enduring result. Whether you’re a seasoned DIY enthusiast or a first-time homeowner tackling a fencing project, understanding the essential tools and techniques can make all the difference. In this blog post, we will explore the indispensable fencing tools you need, guide you through selecting the right materials, and share tips on preparing your site properly. From using correct installation techniques to completing the finishing touches, we’ll provide you with valuable insights to ensure your fencing project goes smoothly and stands the test of time. Get ready to roll up your sleeves and dive into the world of fencing installation with confidence!
Essential Fencing Tools
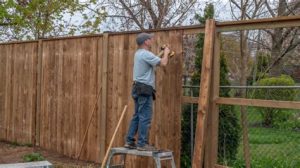
When it comes to installing a fence, having the right tools at your disposal is crucial for a successful project. Different types of fencing materials and installation techniques may require specialized tools, but there are several essential tools that you will need regardless of your fencing choice.
- Post Hole Digger: This tool is essential for digging the holes needed for your fence posts. It comes in various styles, including manual and powered options.
- Level: A level ensures that your posts are straight and that your fence is installed correctly, providing both aesthetic appeal and stability.
- Measuring Tape: Accurate measurements are crucial. A measuring tape will help you determine the proper spacing between posts and the overall length of your fence.
- Saw: Depending on your fencing materials, a quality saw (hand saw, circular saw, or miter saw) is needed to cut the panels and rails to the correct size.
- Hammer: A hammer is an indispensable tool for driving nails and securing materials together.
- Safety Gear: Don’t forget your safety gear, including gloves, goggles, and a hard hat to protect yourself during installation.
By equipping yourself with these essential fencing tools, you can streamline your installation process and ensure a successful project from start to finish. Each tool plays a vital role, so consider carefully what you may need before commencing your fencing installation.
Choosing the Right Materials
When it comes to a successful fencing project, selecting the right materials is crucial. The materials you choose not only affect the overall look of your fence but also its durability, maintenance, and long-term performance. Here’s a guide to help you make an informed decision.
Wood, a traditional favorite, offers a warm, natural aesthetic and can complement various landscapes. However, it requires regular maintenance and treatment against rot and insects. Consider using pressure-treated wood or decay-resistant species like cedar or redwood to enhance longevity.
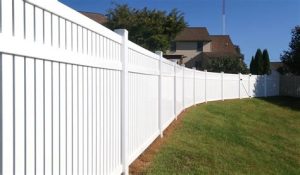
If you’re looking for a low-maintenance option, vinyl fencing might be the way to go. Available in numerous styles and colors, vinyl is resistant to fading, cracking, and peeling, making it an excellent alternative to wood.
| Material | Durability | Maintenance |
|---|---|---|
| Wood | Moderate | Requires regular sealing and staining |
| Vinyl | High | Minimal, usually just occasional cleaning |
| Chain Link | High | Minimal, but may require rust prevention |
| Metal | Very High | Generally low, but may need paint or rust protection |
For added strength and security, consider metal fencing options, such as wrought iron or aluminum. These materials are extremely durable and can withstand harsh weather conditions while offering a modern and elegant appearance.
Lastly, before making any decisions, think about the local climate and the specific requirements of your property.
Preparing the Site Properly
Before embarking on your fencing project, one of the most crucial steps is properly preparing the site. This process ensures that your fencing installation will be both secure and aesthetically pleasing. Below are the essential steps to get your site ready for a successful fencing installation.
Firstly, you should clear the area where the fence will be placed. This involves removing any debris, weeds, or existing structures that might obstruct the installation process. It’s essential to have a clean slate to work with, as this will help you see the layout clearly and prevent any impediments that might arise later.
Secondly, it’s advisable to mark the boundaries of your project. Use stakes and string to outline where the fence will go. This visual reference will help you understand the dimensions and make any necessary adjustments prior to digging. Additionally, be sure to check for any utility lines that may be buried underground; contacting local utility companies can prevent costly mistakes.
Finally, consider conducting a level assessment of the ground where the fence will be installed. If your land is uneven, you may need to take extra steps to level it out, which can involve soil removal or addition. This step is vital to ensure that your fence maintains an even height and looks attractive once completed.
By investing time into these preparation tasks, you set the stage for a smooth installation process and a fence that stands the test of time.
Using the Correct Installation Techniques
When it comes to erecting a fence, utilizing the correct installation techniques is essential for a durable and stable structure. Whether you are a novice or a seasoned DIY enthusiast, understanding the steps involved in the installation process will ensure that your fence stands the test of time.
- Planning the Layout: Before starting, outline the area where the fence will be installed. Use stakes and string to mark the corners and lines.
- Post Installation: Dig holes that are at least a third of the length of your posts below ground. Ensure that they are spaced according to the design of your fence.
- Concrete Use: For added stability, mix and pour concrete around the posts, allowing it to cure according to the manufacturer’s instructions.
- Attaching Rails: Once the posts are set, attach the horizontal rails or panels, ensuring they are level and securely fastened.
- Final Adjustments: Check for any necessary adjustments before securing the panels fully, ensuring they align perfectly with the posts.
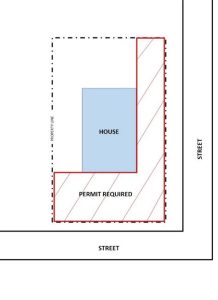
Additionally, remember to keep local regulations in mind when installing your fence. This includes understanding property lines and height restrictions.
Completing the Finishing Touches
After you have installed your fence, the finishing touches can make all the difference in the appearance and durability of your project. Final adjustments not only enhance the visual appeal but can also ensure the longevity of your fence. Here, we will walk through some essential steps to properly finish your fence installation.
One crucial step is to inspect the fence once the installation is complete. Look for any gaps or misalignments. If any issues are found, take the necessary steps to rectify them before proceeding. This might include adjusting the fence panels or tightening screws. Remember, a well-aligned fence looks aesthetically pleasing and functions correctly.
Next, you should apply protective treatments to enhance durability. Depending on the material of your fence, this could involve sealing wooden fences or applying protective paint to metal ones. A good finish will help guard against the elements, preventing rot, rust, or deterioration over time.
Lastly, don’t overlook the importance of landscaping around your fence. Adding plants, shrubs, or mulch can enhance your property’s curb appeal and help integrate the fence into your yard’s overall aesthetic. Creating a beautiful environment around your fence not only completes the look but also provides additional value.
By following these finishing touches, you can ensure that your fence installation is as strong and beautiful as possible, ready to withstand both the elements and the test of time.
Frequently Asked Questions
What are the essential tools needed for installing a fence?
The essential tools include a post hole digger, level, measuring tape, string line, hammer, saw, and a power drill.
Why is a post hole digger important in fence installation?
A post hole digger is crucial for creating deep holes for fence posts, ensuring they are securely anchored in the ground.
How does a level contribute to fence installation?
A level ensures that the fence posts are vertical and straight, which is critical for both aesthetics and stability.
What role does measuring tape play in the installation process?
Measuring tape is used to determine the accurate spacing between fence posts and to measure the height and length of the fence.
What materials might require a saw during the installation?
A saw may be needed to cut fencing panels or posts to the required lengths for a proper fit.
Can I use a power drill for all types of fence installations?
While a power drill is generally useful for securing screws and fasteners, it’s important to ensure it is appropriate for the materials used, such as wood or metal.
Are there any additional tools that can make fence installation easier?
Yes, additional tools like a stake puller, gloves, safety goggles, and a concrete mixer can make the installation process smoother and safer.


