Learn how to build a durable fence with expert tips on materials, layout planning, post installation, and panel attachment.Installing a privacy fence around your backyard is a rewarding project that can enhance your outdoor space, providing both security and seclusion. Whether you’re looking to create a peaceful retreat or simply increase your property’s boundaries, knowing how to properly install a fence can make all the difference. This guide will walk you through the essential steps, from choosing the right materials to planning the layout, and from digging post holes to securing the panels. With the right tools and a bit of patience, you’ll be able to transform your backyard into a private oasis, where you can relax and enjoy the outdoors without interruptions. Let’s dive into the process and ensure your fence is built to last!
Choosing the Right Materials
When it comes to installing a privacy fence around your backyard, selecting the right materials is crucial for ensuring durability, functionality, and aesthetic appeal. The first decision to make is whether you want to use wood, vinyl, metal, or composite materials.
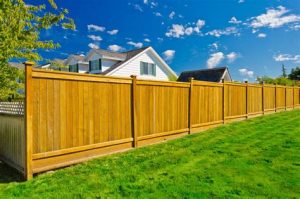
Wood is a traditional favorite, offering a natural look that blends well with most landscapes. Cedar and redwood are popular choices due to their resistance to decay and insect damage. However, wood requires regular maintenance, such as staining or painting, to keep it looking its best.
Vinyl fences have gained popularity because they are low maintenance and available in various colors and styles. Unlike wood, vinyl does not warp or rot, making it a long-lasting option. While initially more expensive, the durability of vinyl can provide savings over time.
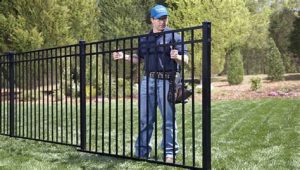
For those looking for a more modern approach, metal fences, such as chain link or aluminum, are great options. They offer excellent security and are incredibly sturdy. Lastly, composite materials combine recycled wood fibers and plastic, providing an eco-friendly choice that maintains the look of wood with less maintenance.
| Material | Durability | Maintenance |
|---|---|---|
| Wood | Moderate | High |
| Vinyl | High | Low |
| Metal | High | Low |
| Composite | High | Low |
Ultimately, the choice of material depends on your budget, style preference, and how much maintenance you’re willing to commit to. Make sure to consider local climate and any homeowner association rules before making your final decision.
Planning the Layout
When it comes to installing a privacy fence around your backyard, one of the most crucial steps is planning the layout. A well-thought-out layout not only ensures an attractive appearance but also helps you avoid potential issues like property line disputes and utility line interference.
The first step is to determine where your property lines are. It’s essential to check your property deed or consult with a surveyor if you are unsure. After identifying your boundaries, you can visualize the area you wish to enclose with the fence.
Next, consider the design you want for your fence. Will it be a straight line, or do you plan to follow the contours of your yard? You can utilize stakes and string to mark the desired layout. This step helps in providing a clear visual during the installation and ensures that the fence will be both functional and aesthetically pleasing. Remember to leave gates at strategic points for access.
| Considerations for Planning the Layout | Details |
|---|---|
| Property Lines | Check your deed or consult a surveyor |
| Design | Decide between a straight line or following contours |
| Access Points | Ensure gates are placed for easy access |
Digging Post Holes
Digging post holes is a crucial step in installing a privacy fence around your backyard. Properly digging holes ensures that your fence will be stable and secure over time. Here, we will outline the key steps to effectively dig your post holes.
Before you begin, it’s essential to gather all necessary tools. You will need a post hole digger, a measuring tape, and a level.
- Mark the Location: Use stakes and string to outline where your posts will go. This will serve as a guide while digging.
- Measure the Depth: Typically, holes should be about one-third of the post length in depth. For example, if your posts are 6 feet tall, aim for a hole that is at least 2 feet deep.
- Start Digging: Using the post hole digger, start removing dirt from the marked locations. For stubborn soil, a power auger can be a valuable tool.
- Check the Depth: Regularly measure the depth to ensure consistency across all holes. A uniform depth will provide greater stability for your fence.
It’s important to keep the holes clean and free from debris as you work. A well-dug hole will not only support the weight of the fence posts but also allow for proper drainage, preventing water from accumulating at the base.
By following these steps, you’ll ensure that the post holes for your privacy fence are correctly dug and ready for the next stages of installation.
Setting the Posts
Once you have chosen the right materials and planned the layout for your privacy fence, the next crucial step is setting the posts. Properly installed posts are essential for the stability and longevity of your fence, as they will support the entire structure.
- Digging the Holes: Start by digging holes for each post, ensuring they are deep enough (typically 1/3 the length of the post) to provide adequate stability.
- Positioning the Posts: Place the posts into the holes and use a level to ensure they are vertical. This is vital for a straight and professional-looking fence.
- Securing the Posts: Fill the holes with concrete or compacted gravel to secure the posts in place. Allow the concrete to cure properly according to the manufacturer’s instructions.
Setting the posts correctly is a step that should not be rushed. Taking the time to ensure they are straight and secure will pay off in the long run with a fence that stands strong against the elements.
As you proceed, ensure that the distance between the posts aligns with the design of your privacy fence. If you’re using pre-made panels, double-check the measurements to accommodate both the panels and any necessary post spacers.
In summary, setting the posts lays the foundation for your fence project. It may require some effort and precision, but investing time in this stage is crucial for a successful installation.
Attaching the Fence Panels
Once you have successfully set your fence posts, the next step in the process of installing a privacy fence is attaching the fence panels. This is a crucial stage that will determine the overall stability and aesthetic appeal of your fencing. It is essential to follow certain steps to guarantee that the panels are securely fastened and aligned correctly.
Before you begin, make sure to have all necessary tools and materials ready, including screws, brackets, a level, and a drill or screwdriver.
- Align the Panels: Start by placing the first fence panel between the posts, ensuring it is level and straight. Use a spirit level to check the alignment.
- Secure the Bottom: Attach the panel to the bottom of the posts using brackets or screws. This initial fastening will secure the panel in place.
- Check for Level: After securing the bottom of the panel, double-check its level before moving on to the next step.
- Attach the Top: Once the bottom is secured and everything is level, secure the top of the panel to the posts using the same method as the bottom.
- Stagger Panels: If you are installing multiple panels, ensure they are staggered properly for a uniform look, and repeat the process for additional panels.
This straightforward process will ensure that your privacy fence is not only functional but also visually appealing. It’s important to take your time and check your work as you go along to guarantee the best results for your backyard sanctuary.
Frequently Asked Questions
What materials do I need to install a privacy fence?
Common materials for a privacy fence include wooden panels, concrete or gravel for the posts, screws or nails, and a level for proper alignment.
How tall can I build my privacy fence?
The height of your fence may be limited by local zoning laws, but typical privacy fences range from 6 to 8 feet tall.
Do I need a permit to install a privacy fence?
Many areas require a permit for fence installation, especially for high fences. Check with your local government or homeowners’ association for specific regulations.
What is the best way to prepare the ground for my fence posts?
You should clear any vegetation, rocks, or debris from the area where you plan to install the posts, and ensure the ground is level.
How deep should I dig the post holes for my privacy fence?
Typically, post holes should be about one-third the height of the fence; for example, if your fence is 6 feet tall, the holes should be about 2 feet deep.
What is the recommended distance between fence posts?
Generally, fence posts should be spaced 6 to 8 feet apart, depending on the type of fence material used.
How can I maintain my privacy fence after installation?
Regular maintenance includes inspecting for damage, cleaning the surface, and applying stain or sealant as needed to protect the wood from weather and wear.
