Learn how to successfully install a fence with essential tools, preparation steps, proper measurements, post installation, and panel attachment techniques.Installing a wrought iron fence can enhance your property’s aesthetic appeal while providing security and privacy. Whether you’re looking to define your yard or create a beautiful boundary, this comprehensive guide will walk you through each step of the installation process. From gathering the necessary tools to setting the fence posts and attaching the iron panels, we’ll provide clear instructions and tips to ensure a successful installation. Wrought iron fences are not only durable but also add a timeless elegance to any landscape. With a little preparation and effort, you can achieve professional-looking results. Let’s dive into the essential steps to transform your outdoor space with a stunning wrought iron fence!
Gathering the Necessary Tools
When it comes to installing a rod iron fence, the first step is gathering the necessary tools for the job. Having all the right tools at your fingertips will make the installation process smoother and more efficient.
- Post Hole Digger
- Sledgehammer: For driving the posts into the ground.
- Level: To ensure your posts are straight.
- Tape Measure: For accurate measurements of your fence line.
- Concrete Mix: To secure the posts in the ground.
- Drill: For attaching panels to the posts.
- Wrench Set: For tightening hardware.
- Safety Gear: Gloves, goggles, and hearing protection.
Before you begin, make sure to check that you have all these tools ready. This preparation not only saves time but also enhances safety, as working with the right equipment reduces the risk of accidents. It’s advisable to double-check that everything is in good working condition long before you start digging.
Additionally, consider any other specialized tools that may be necessary depending on your specific installation plan. For instance, a cutting tool may be useful for trimming the iron panels to fit the desired length. Having the right tools ensures that your project goes off without a hitch, allowing you to focus on achieving a beautiful and secure fence.
Preparing the Installation Site
Before diving into the actual installation of your rod iron fence, it’s critical to prepare the installation site adequately. This preliminary work ensures a smoother process and a more durable fence.
- Clear the Area: Remove any debris, rocks, or vegetation from the space where the fence will be installed. This helps in achieving a clean and level foundation for your fence.
- Check Local Regulations: It’s a good idea to familiarize yourself with any local zoning laws or homeowner association guidelines regarding fence installation. These rules may dictate specifics about height, materials, and boundary placements.
- Locate Utilities: Before digging, use a utility locator service to identify any underground utilities like water, gas, or electric lines. This step is vital for your safety and avoiding costly damages.
- Level the Ground: If the ground is uneven, consider leveling it out. You want your fence to be straight and even, which can be compromised by dips or slopes.
This preparation phase not only streamlines the installation but also impacts the overall aesthetics and functionality of your rod iron fence. Investing time in preparation ultimately saves you both effort and resources down the line. A well-prepared site guarantees that your fence stands strong and durable against the elements.
Once you have completed these steps, you can move onto the exciting part: measuring and marking the fence line. This is where your vision begins to take shape as you outline exactly where your beautiful rod iron fence will stand, so stay organized and precise!
Remember, taking the time to properly prepare your installation site is crucial.
Measuring and Marking the Fence Line
Before you dive into the installation of your rod iron fence, it’s essential to take the time to accurately measure and mark the fence line. This step is crucial as it ensures that your fence will be both aesthetically pleasing and functionally effective.
Start by determining the length of the fence you want to install. Use a tape measure to get precise measurements. It’s advisable to measure multiple times to avoid any discrepancies.
- String Method: Run a string line along the intended fence path to provide a visual reference.
- Chalk Line: Use a chalk line to create a straight line for larger sections.
- Marking Flags: Place marking flags or stakes at the intervals you plan to install posts.
When marking the ground, ensure that you clearly indicate the placement for each post. It’s recommended to space the posts according to the specifications provided by the iron fence manufacturer, typically ranging from 6 to 8 feet apart. This will help maintain structural integrity and ensure your fence is both functional and stylish.
By taking these steps to properly measure and mark the fence line, you’re setting a solid foundation for the rest of your iron fence installation process. Remember, precision at this stage can save you a lot of time and effort later on in the project.
Setting the Fence Posts
Setting the fence posts is a critical step when installing a rod iron fence. Properly positioned posts provide the structural integrity your fence needs, ensuring it stands strong against the elements and time. Below are detailed instructions on how to effectively set the posts for your iron fence.
Before you begin, gather your materials: you will need sturdy posts, a post hole digger or auger, concrete mix, a level, and a measuring tape. Having everything ready will help streamline the process and avoid unnecessary interruptions.
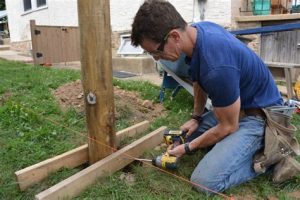
Start by marking the locations for your fence posts. Use a measuring tape to determine the distance between each post based on the design of your fence. A typical distance is between 6 to 8 feet. Once marked, dig holes that are about one-third the length of your posts. For example, if your posts are 6 feet tall, your holes should be at least 2 feet deep. This depth helps to secure the posts against strong winds and pressure.
After digging the holes, place the posts into the holes and use a level to ensure they’re straight. Mix the concrete according to the manufacturer’s guidelines, then pour it into the hole around the post. Make sure the post remains plumb as the concrete sets. It’s beneficial to let the concrete cure for at least 24 to 48 hours before attaching the iron panels. This will provide the necessary strength and stability for your rod iron fence installation.
Attaching the Iron Panels
Once you have successfully installed the fence posts, it’s time to move on to the next crucial step—attaching the iron panels. This phase transforms your framework into a sturdy and aesthetically pleasing fence.
- Gather Your Materials: Before starting, ensure you have all necessary materials, including iron panels, brackets, screws, and a wrench.
- Align the Panels: Position the iron panels between the posts. Make sure that their tops are level with each other and that there are no gaps between the panels and the posts.
- Secure the Panels: Use brackets to secure the panels to the posts. Depending on your fence design, you can either attach the brackets at the top and bottom or use multiple brackets along the height of the panel.
When tightening the screws, be careful not to overtighten them, as this could damage the iron panels. Make sure all screws are evenly tightened to maintain a uniform appearance.
After securing all panels, take a step back and visually inspect the fence. Look for any discrepancies in the alignment or gaps that may need adjusting before finalizing the installation process. A well-installed fence not only enhances the security of your property but also adds aesthetic value.
Finally, once satisfied with the placement of the panels, consider applying a protective paint or finish. This will not only improve the look of your fence but also extend its life by preventing rust and deterioration.
Frequently Asked Questions
What materials do I need to install a rod iron fence?
You will need rod iron fence panels, posts, concrete mix, post anchors, screws, a level, and tools such as a saw, drill, and measuring tape.
What is the first step in installing a rod iron fence?
The first step is to plan the layout of your fence and mark the locations for the posts. Use stakes and string to outline the fence line.
How deep should the fence posts be set in concrete?
Typically, fence posts should be set at least 1/3 of their length into the ground, but at least 2 feet deep is recommended for stability.
How do I ensure that the fence posts are level?
After placing the posts in their holes, use a level to check that they are straight before pouring in the concrete. Adjust as necessary.
How long does concrete take to cure for fence posts?
Concrete usually takes about 24-48 hours to set, but it is advisable to wait a full week before attaching the fence panels to ensure maximum stability.
Can I install a rod iron fence myself, or should I hire a professional?
Installing a rod iron fence can be done by DIY enthusiasts with basic tools and skills, but hiring a professional may be beneficial for complex designs or larger installations.
What maintenance is required for a rod iron fence?
Regular maintenance includes cleaning the fence to remove dirt and grime, inspecting for rust, and applying paint or sealant to protect the iron from weather damage.
