Discover essential tips for effective post installation, including tool selection, measurement techniques, and ensuring proper depth and spacing for lasting stability.When it comes to installing a fence, one of the most crucial steps is digging the post holes correctly. A sturdy fence relies on well-placed and properly dug post holes that not only support the structure but also withstand the test of time and weather. Whether you’re a seasoned DIY enthusiast or a first-time homeowner, understanding the essentials of post hole preparation can make all the difference in the longevity and stability of your fence. In this guide, we will walk you through each important aspect—from choosing the right tools and measuring for placement to creating a stable foundation and ensuring proper depth and spacing. With the right knowledge and techniques, you’ll be well on your way to building a fence that enhances your property and meets your needs. Let’s dig in!
Choosing the Right Tools
When it comes to digging post holes for your fence, having the right tools is essential for ensuring efficiency and ease. Your chosen tools will greatly influence the quality of your work and the time it takes to complete the job.
| Tool | Purpose |
|---|---|
| Post Hole Digger | Specifically designed to excavate narrow holes for fence posts. |
| Shovel | Useful for removing loose soil and for leveling the area around the hole. |
| Digging Bar | Helps break up hard ground and remove stubborn rocks. |
| Measuring Tape | Ensures that your hole placements are correctly spaced. |
| Safety Gear | Gloves and goggles to protect yourself while working. |
With these tools in your arsenal, you will be well-equipped to tackle the task of digging post holes. Always ensure that your tools are in good condition to facilitate the digging process efficiently. If this is your first time digging post holes, consider practicing with a shovel and post hole digger on a smaller area to get a feel for their operation.
Remember, investing in quality tools will not only make the job easier but will also result in a more durable and stable fence. The right tools can save you time and effort, leading to a more professional-looking fence installation.
In summary, having the right tools is a critical first step in the fence-posting process. Equip yourself adequately, and you’ll find that the digging is less of a chore and more of an accomplishment!
Measuring for Post Placement
When it comes to installing a fence, precise measuring for post placement is essential. Accurate measurements ensure that your fence is not only straight but also sturdy. Before you start digging, take the time to measure and lay out your post locations for optimal results.
Firstly, you must determine the fence style and the dimensions you desire. A common rule of thumb is to space fence posts 6 to 8 feet apart, depending on the type of fence you are installing. If you’re installing a wooden privacy fence, the spacing might be closer, about 6 feet, whereas for a chain-link fence, 8 feet may be sufficient.
Once you have established the distance between the posts, use a measuring tape to mark the location of each post with stakes or spray paint. This will not only help in keeping the line straight but also prevent any miscalculations that could lead to an uneven fence. Always double-check your measurements before moving to the next step!
An accurately measured fence layout saves you time and ensures the stability of the finished product.
Finally, remember that some local building codes may require specific distances between posts or certain depths for the holes.
Creating a Stable Foundation
Building a fence requires more than just erecting posts; it necessitates creating a stable foundation to ensure durability and longevity. A good foundation helps to keep your fence upright, preventing it from leaning or collapsing over time.
- Choose the Right Materials: Use high-quality concrete or gravel to support your fence posts. These materials provide excellent stability and drain moisture effectively.
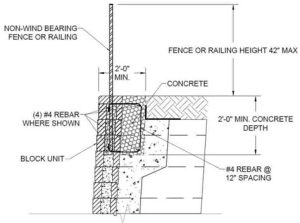
- Dig Deep: Postholes should be at least one-third of the post’s total height, allowing for a deeper anchor in the ground. This depth aids in resisting wind and other forces that can stress the structure.
- Moisture Control: It’s crucial to prevent water accumulation around the base of your posts. Implement proper drainage solutions to extend the lifespan of your fence.
Digging the Post Holes
Digging post holes is a crucial step in the process of building a fence. Ensuring that you do this correctly will provide a solid support for your fence posts. Before you start, it’s essential to know the right tools and techniques to achieve optimal results.
Start by marking the locations where you want your posts to be placed. This can be done using stakes and string to create a clear visual guide for spacing and alignment. Remember that the spacing between the posts really matters; if you’re unsure, refer to the guidelines of the type of fence you’re building.
Once you have your spots marked, it’s time to get digging! Use a post hole digger or a power auger to make the job easier. Aim for a hole depth of at least one-third the height of the fence post above the ground. This ensures stability and a better hold in the ground. Keep in mind that the width of the hole should be about three times the width of the post to allow for proper concrete placement later on.
Ensuring Proper Depth and Spacing
When it comes to digging post holes for your fence, ensuring proper depth and spacing is crucial for creating a sturdy and long-lasting structure. It’s essential to consider factors such as the type of fence, the soil condition, and the size of the posts. A well-installed fence not only maintains its integrity but also complements the aesthetics of your property.
To determine the right depth for your posts, a common rule of thumb is to dig holes that are at least one-third the height of the fence above ground. For example, if you plan to build a 6-foot fence, your post holes should be at least 2 feet deep. This depth provides adequate support and stability, which is especially important for taller fences that are more susceptible to wind and other forces.
Along with depth, spacing between the posts is equally important. Typically, posts should be spaced 6 to 8 feet apart for most fencing types. If you’re installing a gate or a specific type of material, you may need to adjust this measurement accordingly.
Frequently Asked Questions
Why is it important to dig proper post holes for a fence?
Digging proper post holes ensures that the fence will be sturdy and stable, preventing it from leaning or collapsing over time.
What tools do I need to dig post holes?
You will need a post hole digger, shovel, measuring tape, level, and possibly a power auger for larger or tougher jobs.
How deep should post holes be dug?
Post holes should typically be at least one-third the height of the fence post above ground, generally ranging from 2 to 3 feet deep for most fences.
What width should post holes have?
Post holes should generally be about three times the width of the fence post to allow for adequate concrete support and drainage.
How can I ensure post holes are properly spaced?
Use a measuring tape to determine the distance between posts based on the type of fence you are installing, usually about 6 to 8 feet apart.
What type of soil is best for digging post holes?
Loamy or sandy soil is best for digging post holes, while clay or rocky soil can pose challenges and may require additional tools or methods.
How do I deal with water accumulation in post holes?
If water accumulates in the post holes, allow it to drain completely before setting the posts, or consider digging drainage holes to redirect excess water.


