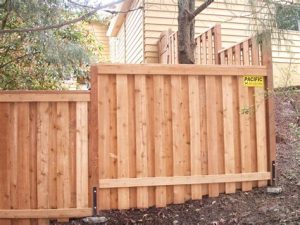
Learn how to choose, prepare, and install fence panels with essential tools and maintenance tips for durability and aesthetics.Installing a fence can be a transformative project for your outdoor space, providing not just privacy and security, but also enhancing the aesthetics of your property. However, the idea of tackling this DIY project can feel daunting without the right guidance. In this blog post, we will explore how to simplify your fence installation using pre-made fence panels, making the process more approachable and efficient. From selecting the perfect fence panels to preparing your installation site and gathering essential tools, we’ll walk you through each step. Plus, we’ll share valuable tips for maintaining your fence panels to ensure they stand the test of time. Whether you’re a seasoned DIY enthusiast or a beginner, this comprehensive guide will empower you to create the fence of your dreams with confidence and ease. Let’s get started!
Choosing the Right Fence Panels
When it comes to building a fence, one of the most crucial decisions you’ll make is choosing the right fence panels. With a myriad of options available, it’s essential to take into consideration your specific needs, preferences, and budget. The type of material you select can significantly alter not only the aesthetic appeal of your property but also its durability and maintenance requirements.
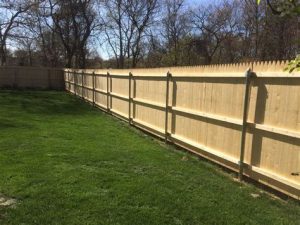
- Wooden Fence Panels: These panels add a classic look but require regular maintenance to prevent rot and decay.
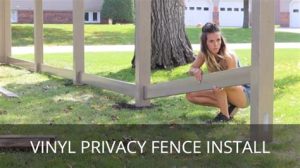
- Vinyl Fence Panels: Highly durable and low-maintenance, vinyl panels are available in various styles and colors.
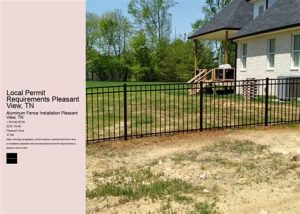
- Metal Fence Panels: Comprising materials like aluminum or wrought iron, metal panels offer strength and security but may be more expensive.
- Composite Fence Panels: Made from a mixture of wood and plastic, composite panels provide the aesthetic of wood with improved durability and less maintenance.
Before making your final decision, consider factors such as privacy, security, and aesthetics based on your property layout. Additionally, think about the climate in your area, as some materials perform better under certain weather conditions.
Preparing the Installation Site
When embarking on a DIY fence panel installation, preparing the installation site is a critical first step. This process not only ensures that your fence is stable and secured but also contributes to a more efficient installation. Begin by researching any local regulations regarding fence placements and height restrictions to avoid any legal complications.
- Clear the Area: Remove any debris, vegetation, and obstacles such as rocks or existing structures that could hinder installation.
- Mark the Boundary: Use stakes and string to outline the perimeter of your fence. This visual representation will help you understand the layout and identify any adjustments needed.
- Check for Underground Utilities: Contact local utility companies to mark the location of underground lines. This step is crucial to prevent any damage to utilities that could lead to costly repairs.
- Level the Ground: Ensure that the ground is mostly level where the fence will be placed. If there are any significant dips or rises, it may require additional work to create a flat base.
By following these preparation guidelines, you can ensure a smooth installation process for your fence panels. Taking the time to properly prepare your site may save you from potential issues later on, resulting in a sturdier and more aesthetically pleasing fence.
Tools and Materials You’ll Need
When embarking on a DIY fence installation project, having the right tools and materials is crucial to ensure a smooth and efficient process. Below is a comprehensive list of what you will need to get started.
| Tools | Description |
|---|---|
| Post Hole Digger | For digging holes to set your fence posts securely in the ground. |
| Level | To check that your fence panels are perfectly vertical and straight. |
| Tape Measure | To measure the distance between panels and ensure proper spacing. |
| Power Drill | For fastening screws into your fence panels and posts. |
| Hammer | To drive nails if you are using wooden fence panels. |
In addition to these tools, you will also need a variety of materials to complete your fence installation.
- Fence Panels – Choose the style and material that suits your requirements.
- Fence Posts – These provide the primary support for your fence.
- Screws or Nails – Depending on the type of fence panel you have chosen, you will need screws or nails to secure the panels.
- Concrete Mix – To secure your posts in the ground for better stability.
- Wood Preservative or Paint – If you’re using wood panels, this can ensure durability against elements.
Gathering the right tools and materials before you start your fence installation project will save you time and frustration.
Step-by-Step Installation Process
Installing fence panels is a great way to enhance your property while adding privacy and security. By following a step-by-step installation process, you can ensure your fence is sturdy and looks professional. Here’s a comprehensive guide on how to effectively install your fence panels.
Step 1: Begin by marking the locations for your fence posts based on your desired layout. Use stakes and string to outline the perimeter of the fence. Ensure your layout is straight and adjust as necessary.
Step 2: With the layout marked, proceed to dig holes for the fence posts. The depth of the holes should be approximately one-third of the overall length of the posts, typically around 2-3 feet, depending on local regulations and terrain conditions. A post hole digger or auger can make this task easier.
Step 3: Once the holes are dug, place the fence posts in the holes and check for vertical alignment using a level. While doing this, make sure to brace the posts to prevent them from shifting. Pour quick-setting concrete around the posts for added stability.
Step 4: Allow the concrete to set as per the manufacturer’s instructions, usually 24-48 hours. After the concrete has cured, you can begin attaching the fence panels to the posts.
Step 5: Securely fasten each fence panel to the posts using appropriate hardware, such as brackets or screws. Ensure the panels are level and aligned correctly. Continue this process until all panels are installed.
Step 6: Once all panels are in place, perform a final inspection to ensure everything is securely attached and level. Make any necessary adjustments.
Step 7: Finally, backfill around the post holes with soil, packing it tightly for additional support. Clean up the work area and enjoy your new fence!
Tips for Maintaining Fence Panels
Maintaining your fence panels is essential for ensuring their longevity and functionality. Regular upkeep can prevent decay, rust, and other forms of damage.
- Regular Inspections: Schedule routine checks to identify any signs of damage or wear. Look for loose boards, gaps, or signs of rot.
- Cleaning: Use a pressure washer or a garden hose to remove dirt, moss, and algae that can accumulate on your fence panels. This helps in preventing decay.
- Sealing and Staining: Apply a protective stain or sealant every couple of years to safeguard your fence panels from moisture and UV damage.
- Addressing Repairs Promptly: If you spot any issues during your inspections, such as a loose panel or rusted hardware, address them immediately to avoid further damage.
- Weed Control: Keep weeds and vegetation away from the base of your fence panels to prevent moisture buildup and promote air circulation.
Consider using wood preservatives if your fence panels are made of wood. This can lengthen their lifespan significantly and enhance their natural beauty.
For vinyl or metal fence panels, ensure to check the manufacturer’s care instructions. These materials often require different maintenance protocols.
By following these simple yet effective tips, you can keep your fence panels looking great and functioning well for years to come.
Frequently Asked Questions
What are fence panels?
Fence panels are pre-assembled sections of fencing that provide a quick and easy way to create a boundary or enclosure.
Why should I choose fence panels for my DIY project?
Choosing fence panels simplifies the installation process, as they eliminate the need for constructing a fence from scratch, saving time and effort.
What tools do I need for installing fence panels?
Basic tools such as a post hole digger, level, tape measure, hammer, and possibly a saw for adjustments are typically required for installing fence panels.
How do I prepare my yard for fence panel installation?
Clear the area where the fence will be installed, marking the boundaries, and ensuring that there are no underground utilities or obstructions.
How do I ensure my fence panels are level?
Use a level tool to check each panel as you install them, adjusting as necessary to ensure a uniform height throughout the fence.
What types of materials are available for fence panels?
Common materials for fence panels include wood, vinyl, metal, and composite, each offering different aesthetics, strengths, and maintenance needs.
How can I customize my fence panels after installation?
Customization options include painting or staining wooden panels, adding decorative caps, or even installing lattice on top for added style.
