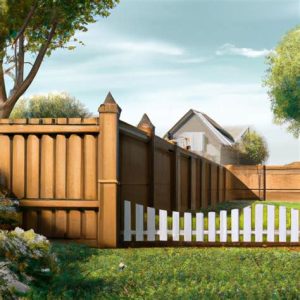
Learn how to design, gather materials, prepare the ground, construct fence panels, and apply finishing touches for durable fence installation and maintenance.Are you considering adding a fence to your backyard but don’t know where to start? Installing a fence can enhance your outdoor space, provide privacy, and increase property value. While the task may seem daunting, a DIY approach can make the project both rewarding and economical. In this blog post, we’ll guide you through the entire process—from planning your fence design to gathering the necessary materials and tools, preparing the ground for installation, constructing the fence panels, and applying those all-important finishing touches. By following these straightforward steps, you’ll be well on your way to creating a stunning and functional fence that meets your needs and reflects your personal style. Let’s dive into the essentials of backyard fencing and transform your outdoor area!
Planning Your Fence Design
When it comes to planning your fence design, the first step is to consider the purpose of the fence. Is it for privacy, security, aesthetic appeal, or a combination of these? This will provide a clear direction for your project.
Next, evaluate your property lines and determine the size and location of your fence. It’s crucial to check local regulations and any homeowner association guidelines to ensure compliance. You may want to create a simple sketch or use software to visualize the dimensions and layout of your fence.
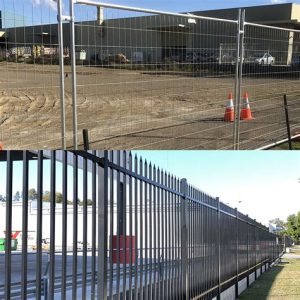
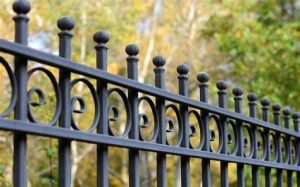
Another essential aspect to consider is the style of the fence. There are numerous designs available, from traditional picket fences to modern privacy screens. Each style can impact the overall look of your yard, so think about how it complements your home and landscaping. Choosing the right materials, such as wood, vinyl, or metal, is also important, as it affects both the durability and maintenance required.
Finally, remember to plan for any gates or access points, ensuring they are functional and fit seamlessly into your design. With careful consideration and planning, your fence will not only serve its intended purpose but also enhance the beauty of your backyard.
Gathering Necessary Materials and Tools
When embarking on a DIY fence installation, gathering the necessary materials and tools is crucial for a successful project. The type of fence you choose will significantly influence what you need. Before you start, ensure you have done your research on the fencing style you want and its requirements.
| Materials | Tools |
|---|---|
| Fencing panels or boards (wood, vinyl, or metal) | Post hole digger or auger |
| Fence posts (wood, vinyl, or metal) | Level |
| Concrete mix (for setting posts) | Saw (for cutting panels or posts) |
| Nails or screws (depending on material) | Hammer or drill |
| Hinges and latches (for gates) | Measuring tape |
Additionally, don’t forget to stock up on safety gear such as gloves, goggles, and sturdy work boots to protect yourself while working.
Preparing the Ground for Installation
Before you begin constructing your fence, it is crucial to prepare the ground where the fence will be installed. This preparation phase ensures a sturdy foundation and long-lasting durability.
- Clear the Area: Start by removing any debris, rocks, or vegetation from the installation site. A clear area facilitates easier digging and prevents obstacles during the installation process.
- Mark the Layout: Use stakes and string to outline the perimeter of your fence. This visual guide will help ensure that your fence is straight and aligned correctly.
- Measure Depth: Determine the depth for your fence posts based on the type of fence you’re installing. Generally, a good rule of thumb is to bury at least one-third of the total height of the fence.
After marking the layout and measuring the depth, it’s time to dig the post holes. Use a post hole digger for wider holes or a power auger for deeper installations. Make sure each hole is evenly spaced and deep enough, as this significantly contributes to the fence’s stability.
Finally, consider checking for any underground utilities before you begin digging. Contact your local utility company to ensure the area is clear of wires and pipes to avoid accidents.
Taking the time to adequately prepare the ground will make the installation process smoother and the fence more reliable. This foundational work is often overlooked but is key to a successful DIY fencing project.
Constructing and Installing Fence Panels
Once you have successfully planned your fence design and gathered all the necessary materials, it’s time to dive into the exciting phase of constructing and installing fence panels. This stage is crucial as it sets the foundation for the stability and aesthetics of your fence. Let’s walk through the essential steps for a flawless installation.
- Measuring tape
- Level
- Power drill
- Saw
- Wooden or metal stakes
- Concrete mix (for wooden fences)
Begin by marking the location of your fence posts. Use wooden or metal stakes to indicate where each post will go, ensuring that they are evenly spaced according to your fence design. The general rule of thumb is to space your posts 6 to 8 feet apart depending on the style of your fence. After marking, dig holes for the posts, typically about one-third of the post’s length, ensuring they are deep and wide enough to hold the posts securely.
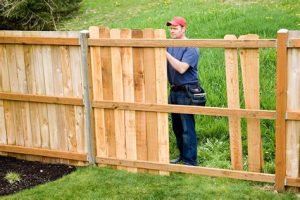
Once your holes are prepared, place the posts into the holes and check with a level to ensure they are plumb. After confirming that the posts are vertical, fill the holes with a concrete mix to provide stability. Allow the concrete to cure for at least 24 hours before proceeding. Next, it’s time to attach your fence panels to the posts. Use your power drill to secure the panels, making sure they are level and evenly spaced.
With all panels installed, take a moment to inspect the fence for any gaps or misalignments, making any necessary adjustments. Ensure that everything is secure and well-positioned, as this will contribute to the long-term reliability of your fence.
Applying Finishing Touches and Maintenance
Once you have successfully installed your fence, the next crucial step is applying the finishing touches to ensure it not only looks great but also lasts longer. Start with a thorough inspection of the fence. Check the posts, panels, and gates for any gaps or loose fittings that may require tightening. Proper alignment is important for both aesthetics and safety.
Next, consider applying a protective finish if your fence is made of wood. This could be a stain or sealant that will help protect against weathering, mold, and insects. Make sure to choose a product that is suitable for exterior use, and follow the manufacturer’s instructions for application. Applying a coat of paint can also enhance the look of your fence and give it a personal touch while providing additional protection.
Don’t forget to perform regular maintenance checkups on your fence. This includes cleaning it periodically to remove dirt, debris, and any potential growths like moss or ivy that could affect its integrity. Periodic inspections and timely repairs will ensure your fence remains in good condition and continues to serve as an attractive and functional boundary for your backyard.
Frequently Asked Questions
What materials do I need for installing a fence?
You’ll need fence panels, posts, concrete or gravel for securing the posts, nails or screws, and tools like a saw, level, and post hole digger.
How deep should I dig the post holes?
Generally, post holes should be about one-third the height of the fence above ground, typically 2 to 3 feet deep for most fences.
What type of fence is best for privacy?
Wood fences and vinyl fences are popular choices for privacy because they can be built to a height that blocks out views.
How can I ensure my fence is straight?
Use a string line or level to guide you while installing the fence panels, and regularly check with a level to maintain alignment.
Do I need a permit to install a fence?
This depends on your local regulations, so it’s best to check with your city or county to determine if a permit is required.
What should I do about local property lines?
It’s crucial to know your property lines to avoid disputes with neighbors. You can check property documents or hire a surveyor.
How long does it typically take to install a fence?
The time can vary depending on the size and type of the fence, but it usually takes one to three days to complete a standard backyard fence installation.
