Learn the complete guide to fencing installation, from choosing materials to adding finishing touches and maintaining your fence for lasting durability.Are you looking to enhance your outdoor space and add a touch of charm to your property? Installing decorative fencing can be the perfect solution! Not only does it boost your curb appeal, but it also provides privacy and defines your garden or yard boundaries. The best part? You can tackle this project on your own with just a little guidance. In this DIY guide, we’ll cover everything you need to know, from selecting the right fencing material to preparing the installation area and gathering all the necessary tools. We’ll take you through a step-by-step installation process and discuss how to add those finishing touches that truly make your fence stand out. Let’s get started on transforming your outdoor space with a beautiful decorative fence!
Choosing the Right Fencing Material
When it comes to installing decorative fencing, selecting the right fencing material is crucial for achieving both aesthetics and functionality. The right material not only enhances your property’s curb appeal but also ensures long-lasting durability.
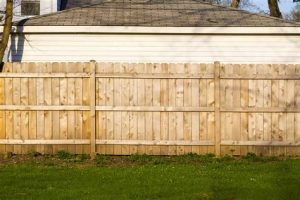
- Wood: A classic choice for many homeowners, wood fencing can provide a rustic charm. It’s versatile, allowing for various styles like picket or privacy fences. However, it requires regular maintenance to prevent rot and damage.
- Vinyl: Vinyl fencing is known for its low maintenance and durability. It’s available in various colors and styles, providing a clean, modern look that resists fading and damage from the elements.
- Metal: Options like aluminum and wrought iron offer strength and security. They are ideal for decorative purposes while providing a strong barrier. Metal fences are often treated to resist rust and wear.
- Composite: This material combines wood fibers and plastic, providing the best of both worlds. Composite fencing is resistant to rot and insects while maintaining a natural wood appearance.
- Chain Link: While not the most decorative option, chain link fencing is cost-effective and provides a transparent barrier. Many homeowners opt to add slats for privacy and style.
Budget: Assess what you’re willing to spend, as some materials like wood can be more expensive than vinyl or chain link.
Maintenance: Determine how much time and effort you are willing to invest in maintaining your fence.
Aesthetic Preferences: Think about how you want your fence to complement your home’s architectural style.
By carefully evaluating your needs and preferences, you can choose the right fencing material that will not only enhance the beauty of your property but also provide the functionality you require.
Preparing the Installation Area
Before embarking on your decorative fencing installation, taking the time to properly prepare the installation area is crucial. This step not only ensures a smoother process but also lays the foundation for a stable and long-lasting fence.
- Evaluate Your Yard: Begin by surveying your yard to determine where the fence will be placed. Look for any obstructions, such as trees, roots, and existing structures that could interfere with the installation.
- Check Local Regulations: It’s important to check with local authorities regarding any fencing regulations, permits, or setback requirements that may apply to your installation.
- Mark Your Property Line: Use stakes and string to clearly mark the intended path of your fence. This will help prevent any accidental encroachment onto neighboring properties.
- Clear the Area: Remove any debris, rocks, or vegetation in the installation zone. You may also need to level the ground in some areas to create a consistent and even base for your fencing.
By addressing these key components, you will create a solid groundwork for your fence installation project. Neglecting these preparatory steps can lead to complications down the road, so it’s essential to get this phase right the first time.
In addition, consider the weather conditions before starting your work. Ideal conditions such as dry weather will help ensure that the installation time is efficient and that the materials perform as expected.
Having a well-prepared area can make all the difference between a successful DIY fencing project and one fraught with issues. By following these guidelines, you’ll be set up for success in your fencing installation journey.
Gathering the Necessary Tools and Materials
When it comes to installing decorative fencing, having the right tools and materials is essential for a smooth and successful project. Before you start, it’s important to ensure that you have everything you need to make the installation process quicker and easier.
- Fencing Panels: Choose the style and material that matches your aesthetic.
- Posts: Wooden or metal posts serve as the main structure of your fence.
- Concrete Mix: Necessary for setting the posts securely in the ground.
- Post Hole Digger: Used to dig deep holes for your posts.
- Level: Ensures that your fence is perfectly straight.
- Tape Measure: For accurate measurements during installation.
- Fence Brackets: These will help secure panels to the posts.
- Drill and Bits: To make holes for screws and secure brackets.
- Screws and Fasteners: Needed for assembling the fence.
- Safety Gear: Gloves, goggles, and a hard hat for personal protection.
Once you have gathered all of your tools and materials, you will be well-prepared to start your fencing project. Always double-check your inventory to ensure nothing is missing. Proper preparation will not only save you time during the installation but also help to avoid potential complications down the line.
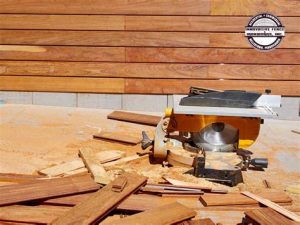
It’s important to consider the specific requirements of the type of fencing you are installing. Different materials may require additional tools or unique fasteners. For instance, if you’re using vinyl fencing, you might need a specialized cutting tool to ensure clean edges.
By carefully organizing your tools and materials, you can create an efficient workspace. This will make your fencing installation process more enjoyable and successful.
Step-by-Step Fencing Installation Process
Installing decorative fencing can significantly enhance your property’s aesthetics and provide necessary boundaries. Here’s a comprehensive step-by-step guide to help you through the installation process. Follow these steps for a successful DIY project!
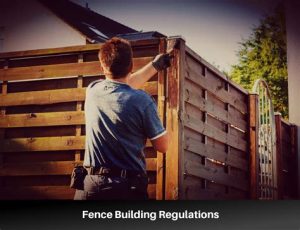
Before you start digging, outline the fence layout in your yard. Use stakes or spray paint to mark the positions of the fence posts. Be sure to check local regulations regarding fence heights and property lines to avoid any issues.
- Fence panels or slats
- Wooden or metal posts
- Concrete mix
- Power drill
- Level
- Tape measure
- Shovel
- Safety gear (gloves, goggles)
Using a shovel or post hole digger, create holes for the fence posts. The holes should be at least one-third the length of the posts. Make sure to space the holes according to the width of your fence panels.
Place the fence posts into the holes. Use a level to ensure each post is straight. Fill the holes with concrete mix, allowing it to set as per the manufacturer’s instructions. Make sure the posts are securely anchored and won’t wobble.
Once the concrete has cured, it’s time to attach the fence panels. Use screws or nails to secure each panel to the posts. Ensure that they are aligned and level, making adjustments as necessary.
Cut any excess panels or posts protruding above the desired height. Sand down rough edges and apply paint or a protective sealant if needed to improve the durability and appearance of your new fence.
Finally, maintain your fence by periodically checking for loose panels or posts and repairing any damage. This will ensure your decorative fence remains in top condition for years to come.
By following these steps, you’ll be able to install your decorative fencing easily and effectively.
Adding Finishing Touches and Maintenance
After successfully installing your decorative fencing, the finishing touches can make all the difference in enhancing its beauty and longevity. One important aspect of these touches is to apply a protective finish, especially if your fence is made of wood. Use a high-quality sealant or paint designed for outdoor use to prevent moisture damage and premature wear.
In addition to protective finishes, consider adding features that can enhance the functionality and aesthetics of your fencing. For instance, you may want to install decorative caps on the tops of the fence posts. These caps not only provide a polished look but also help to keep water from pooling on top of the posts, which can lead to rot.
Lastly, regular maintenance is crucial to preserving the integrity of your decorative fencing. Periodically inspect for any signs of wear, such as corrosion on metal fences or rot on wooden ones. Cleaning the fence with a gentle solution can also prevent the build-up of dirt and mold, keeping your fence looking its best for years to come.
| Maintenance Task | Frequency |
|---|---|
| Inspect for Damage | Every 6 Months |
| Clean for Dirt and Mold | Annually |
| Reapply Sealant or Paint | Every 2-3 Years |
Frequently Asked Questions
What materials do I need for installing decorative fencing?
You’ll typically need fencing panels, posts, concrete mix for securing posts, nails or screws, a level, tape measure, and potentially paint or stain for finishing.
How do I prepare the ground before installing the fence?
Begin by marking the area where the fence will go, removing any grass and weeds, and leveling the ground as needed to ensure a smooth and stable installation.
What are the steps to install the fence posts?
Start by digging holes for the posts, usually 2 feet deep. Place the posts in the holes, ensuring they are level, then fill the holes with concrete and allow it to set according to the manufacturer’s instructions.
How do I attach the decorative fencing panels to the posts?
Once the concrete has set, attach the panels to the posts using nails or screws, ensuring they are evenly spaced and secured tightly for stability.
What finishing touches can I add to my decorative fencing?
Consider painting or staining the fence to match your outdoor decor, adding caps to the posts, or landscaping around the base to enhance its appearance.
How do I maintain my decorative fencing after installation?
Regularly check for any damage, clean the panels as needed, and reapply paint or stain every few years to protect the wood and maintain its aesthetic appeal.
Can I install decorative fencing without professional help?
Yes, this project can be a DIY task if you have basic tools and follow instructions carefully, making it a rewarding venture for homeowners.


