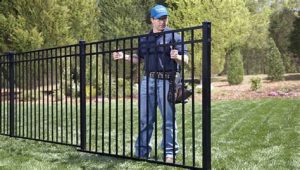
Learn how to install a fence by understanding local regulations, choosing materials, preparing the area, setting posts, and attaching panels effectively.When it comes to enhancing the privacy and charm of your outdoor space, installing a wooden fence is a fantastic DIY project that can add both value and beauty to your property. However, before you dive into the installation process, it’s essential to navigate a few crucial steps to ensure a successful outcome. From checking local regulations to choosing the right materials, proper preparation can make all the difference. This guide will walk you through each stage, including preparing the area for installation, setting the fence posts, and attaching the fence panels, so you can build a sturdy and attractive wooden fence that stands the test of time. Whether you’re a seasoned DIY enthusiast or a beginner, these step-by-step instructions will help you transform your vision into reality. Let’s get started!
Checking local regulations
Before embarking on the journey of installing a wooden fence, it is crucial to check local regulations. Different areas have specific rules that govern where you can place fences, their height, and the materials used. Ignoring these regulations can lead to disputes with neighbors and potential fines.
To begin, contact your local city or county zoning office. They can provide you with the necessary information regarding fence height limits, property line restrictions, and any required permits. Some municipalities even have specific aesthetics guidelines that dictate the type of materials you can use.
Additionally, consider discussing your plans with adjacent neighbors. Not only is this a good practice for maintaining relations, but it may also provide insight into any unwritten community rules. Some neighborhoods have homeowner associations (HOAs) that enforce their own regulations, so it’s important to be well-informed to avoid any complications during your project.
Choosing the right materials
When it comes to installing a wooden fence, selecting the right materials is crucial for ensuring the durability and aesthetic appeal of your fence. Understanding the different types of wood and other materials available plays a large role in the overall success of your project.
Common wood types for fencing include cedar, redwood, pine, and spruce.
| Wood Type | Durability | Cost |
|---|---|---|
| Cedar | High | Medium to High |
| Redwood | Very High | High |
| Pine | Medium | Low |
| Spruce | Low to Medium | Low |
In addition to wood, you should also consider other materials such as fencing hardware (posts, screws, brackets) and protective treatments (stains, sealants). Choosing high-quality hardware can prevent sagging and improve the overall stability of your fence, while protective treatments will extend the life of the wood, keeping it resistant to decay, warping, and insect infestations.
Preparing the area for installation
Before you dive into the exciting process of installing your wooden fence, it’s crucial to properly prepare the area where the fence will be placed. This preparation is a vital step that ensures a smooth installation and longevity for your fence. Here, we will guide you through the key steps in preparing the area effectively.
First, you need to clear the area where the fence will go. This means removing any debris, rocks, or vegetation that may impede the installation process. Use a shovel and rake to level the ground as much as possible. This also helps in ensuring that your fence panels sit evenly, which is important for both aesthetics and functionality.
Next, it’s essential to check for underground utilities such as water, electricity, or gas lines. Many local governments have programs that allow you to request a utility marking service. Ensuring that you avoid these utilities will not only keep you safe but will also prevent costly repairs and disruptions. Once you have cleared the area and confirmed that there are no obstructions, you can move on to marking the fence line using stakes and string. This provides a visual guide for where the posts will be installed, keeping everything aligned and straight.
Setting the fence posts
Once you have checked the local regulations and chosen the right materials for your wooden fence, it’s time to set the fence posts. This critical step will lay the foundation for a sturdy and long-lasting fence. Here’s a step-by-step guide to ensure your fence posts are installed correctly.
1. Gather Your Tools: Before you begin, make sure you have the necessary tools ready.
- A post hole digger or auger
- Concrete mix or gravel
- Level
- Tape measure
- String line
2. Mark the Positions: Use a tape measure to determine the distance between posts, ensuring that they are spaced according to your fence design. Mark the locations by placing stakes in the ground where each post will go.
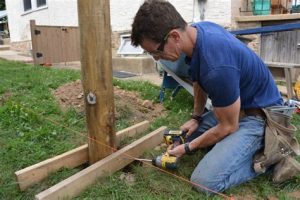
3. Dig Post Holes: For each marked location, use your post hole digger to create a hole that is at least 1/3 of the post’s length. The holes should be about 6-8 inches wider than the posts to allow for concrete or gravel placement.
4. Set the Posts: Place the posts in the center of the hole, ensuring each is vertical using a level. To keep everything aligned, run a string line from post to post.
5. Pour Concrete or Gravel: If you are using concrete, mix it according to the package instructions and pour it around the post. If you choose gravel, fill the hole around the post with gravel and tamp it down firmly. For both methods, allow adequate time for curing if using concrete.
By following these steps, you will ensure that your fence posts are securely set, providing a strong framework for attaching the fence panels later on. Always double-check your work for accuracy as this is a vital part of your fence installation.
Attaching the fence panels
After you have securely set the fence posts in place, it’s time for the next exciting step in your fence installation project: attaching the fence panels. This step is crucial as it determines the overall look of your fence and its durability. Here’s a detailed guideline on how to do this properly.
- Wooden fence panels
- Wood screws or nails
- Drill or hammer
- Level
- Measuring tape
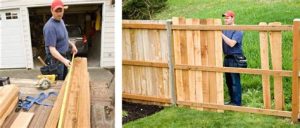
1. Align the Panels: Start by placing the first panel between two posts and ensure it’s level. Using your measuring tape, make sure the bottom of the panel is evenly spaced from the ground. Adjust the height if necessary.
2. Secure the Panels: Once aligned, use the drill or hammer to fasten the panel to the posts. If you’re using screws, make sure to pre-drill holes to prevent the wood from splitting. Typically, you want to secure at least two screws or nails on each side of the panel for stability.
3. Complete the Installation: Repeat this process for each panel until the entire fence is completed. Periodically check that each panel remains level as you progress.
Following these steps will ensure that your panels are securely attached and will provide long-lasting support for your new fence.
Frequently Asked Questions
What tools are necessary for installing a wooden fence?
For installing a wooden fence, you will need tools such as a post hole digger, hammer, level, measuring tape, saw, and screws or nails.
How do I choose the right wood for my fence?
When choosing wood for your fence, consider durability, aesthetics, and budget. Common choices include cedar, pine, and redwood. Ensure the wood is treated to withstand weather conditions.
What is the first step in the installation process?
The first step in the installation process is to plan your fence layout. Measure the area, mark the corners and gates, and check for any underground utilities.
How deep should fence posts be installed?
Fence posts should generally be installed one-third of their length deep in the ground for stability. A minimum depth of 2 feet is recommended for typical wooden fences.
What type of concrete should be used for setting fence posts?
You can use quick-setting concrete or regular concrete mix to set your fence posts. Quick-setting concrete helps speed up the process, allowing you to install the next post sooner.
How can I ensure my fence is straight and level?
To ensure your fence is straight and level, use a level tool frequently while installing each panel. You can also use string lines between posts as a guide.
What maintenance is required for a wooden fence after installation?
After installation, it’s important to regularly clean your wooden fence and apply a protective sealant or stain every few years to prevent rot, warping, and fading from UV exposure.
