Learn how to build a durable fence with the right materials, proper measurements, and essential maintenance tips for a polished finish.Installing your own fence can be a rewarding DIY project that not only enhances your property’s curb appeal but also provides privacy and security. However, it’s essential to approach this task with careful planning and the right knowledge. Whether you’re looking to create a boundary for your garden, a safe play area for your children, or simply wanting to improve aesthetics, choosing the right materials and understanding the proper installation techniques is crucial. In this blog post, we’ll guide you through the key steps of a successful fence installation, covering everything from selecting the best materials to the final finishing touches. With our top tips, you’ll be equipped to tackle this project with confidence and achieve a sturdy, beautiful fence that meets your needs. Let’s dive into the essential aspects of installing your own fence!
Choosing the Right Materials
When it comes to installing your own fence, selecting the right materials is critical to the overall success and durability of the project. Various fencing materials come with unique benefits and drawbacks, making it essential to assess your needs before making a decision.
- Wood: Offers a natural appearance and can be treated for longevity, but requires regular maintenance to prevent rot.
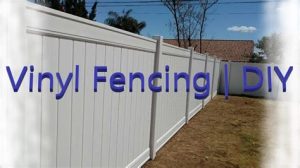
- Vinyl: Low maintenance and available in many styles, but may not be as strong as wood or metal.
- Chain Link: Affordable and durable, but provides minimal privacy and requires careful installation.
- Composite: Made from recycled materials and offers a wood-like appearance with less upkeep.
- Metal: Often used for security purposes; options include wrought iron and aluminum, both known for their strength and longevity.
When figuring out which materials to use, consider factors such as your budget, the climate in your area, and the specific purpose of the fence. For instance, a privacy fence in a windy area may benefit from sturdier materials to withstand harsh conditions. Be sure to also check your local regulations and HOA guidelines, as some neighborhoods have specific restrictions on fence materials and heights.
Measuring and Planning
Proper measurement and effective planning are crucial steps when it comes to installing your own fence. Neglecting these steps can lead to unforeseen issues later, resulting in unnecessary expenses and prolonged installation time.
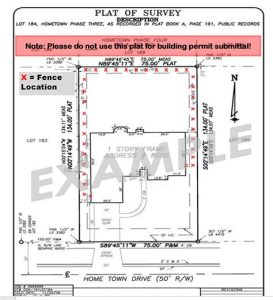
1. Understand Your Property Lines: Before you begin, it’s essential to know where your property lines are clearly marked. Refer to your land survey or deed to avoid disputes with neighbors.
2. Determine the Purpose of Your Fence: Is it for privacy, security, or decorative purposes? Understanding the function will help you decide on the type of fence style and material suitable for your needs.
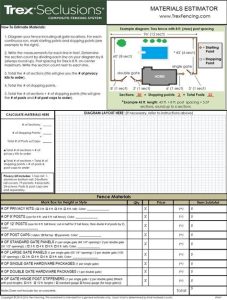
3. Create a Detailed Plan: Sketching a layout of your fence will save you time and avoid mistakes. Include entries, corners, and any changes in elevation. Using a measuring tape and marking stakes can help turn your plan into reality.
Once you have a comprehensive plan, you can efficiently move on to the next steps in your fence installation process.
Digging and Setting Posts
When it comes to installing a fence, digging and setting posts is one of the most crucial steps. Properly installed posts provide the foundation for your entire fence, ensuring its stability and longevity. Here are some essential tips to guide you through this process.
First, you’ll want to mark the location of your fence posts accurately. Use a measuring tape and stakes to outline the fence line. Ensure that the distance between each post is consistent—typically between 6 to 8 feet apart, depending on the type of fence you’re installing.
Next, it’s time to start digging. A post hole digger or an auger is ideal for this task. You’ll want to dig each hole to a depth of at least one-third of the post’s length, and the holes should be wider than the posts to accommodate the *concrete* you’ll be using to secure them. Aim for a depth of approximately 2 to 3 feet for most fences.
Once the holes are dug, place your posts in them, making sure they are level and plumb. Use a level to check the alignment. Pour concrete mix around the base of the posts and pack it down firmly to eliminate any air pockets. Adding water to the mix according to the manufacturer’s instructions will help the concrete set effectively. Allow it to cure, which usually takes a few days, before continuing with the installation of the fence panels.
By following these tips for digging and setting posts, you will create a solid foundation for your fence, ensuring its durability for years to come.
Properly Securing Panels
Securing your fence panels is a crucial step in ensuring not only the aesthetics but also the durability of your fence. A well-secured fence can withstand harsh weather conditions, potential impacts, and the test of time. Here are some top tips to help you properly secure your fence panels.
First and foremost, ensure that you use appropriate fasteners for your fencing material. For wooden panels, galvanized nails or screws are recommended to prevent rusting. For vinyl or metal, refer to the manufacturer’s specifications to find the correct type of fasteners. Choosing the right fasteners will contribute to the overall strength of your fence.
Another important aspect is to check that your panels are level and aligned. This can be done by using a level tool before you fasten the panels in place. Once they are properly aligned, use diagonal bracing during installation for added support. This keeps your panels from sagging and ensures they remain vertically straight.
| Fencing Material | Recommended Fasteners |
|---|---|
| Wood | Galvanized nails or screws |
| Vinyl | Manufacturer’s specific fasteners |
| Metal | Self-tapping screws |
Finally, consider adding a sealant or wood preservative after installation for wooden fences. This extra layer can help protect against moisture and pests that might compromise the integrity of your fence. Taking these steps will ensure your panels are not only secure but also long-lasting, providing you with the privacy and protection you desire.
Maintaining and Finishing Touches
Once your fence is installed, the real work of *maintaining* and adding the *finishing touches* begins. Paying attention to these elements can prolong the lifespan of your fence and enhance its appearance, ensuring it looks great for years to come.
- Inspect your fence regularly for any signs of wear, damage, or decay.
- Clean your fence with a power washer or scrub brush to remove dirt and mildew.
- Repaint or stain as needed to protect wood from the elements.
A well-finished fence not only improves aesthetic appeal but also helps in preserving the materials used.
Enhancing your fence can be as simple as adding decorative caps to the posts or using a weather-resistant sealant. Additionally, consider landscaping around the base to integrate the fence into your yard’s design.
Frequently Asked Questions
What are the essential tools needed for installing a fence?
Basic tools include a post hole digger, tape measure, level, hammer, and a saw for cutting the fence panels or posts.
How do I determine the property line for my fence installation?
Check your property deed or survey for boundary lines, and consider consulting with a land surveyor if you’re unsure.
What type of fence material is best for DIY installation?
Vinyl and wood are popular choices for DIY fence installation due to their availability and ease of handling, but chain-link or metal may also be options based on your needs.
How deep should I dig the post holes for my fence?
Typically, post holes should be at least one-third the height of the fence above ground, generally around 2-3 feet deep for most residential fences.
How can I ensure my fence posts are straight and level?
Use a level to check each post during installation and secure them in place before backfilling with concrete to ensure they remain straight.
What is the best way to secure the panels to the fence posts?
Use screws or nails specifically designed for outdoor use to secure the panels to the fence posts, ensuring that they are spaced evenly.
What are some common mistakes to avoid when installing a fence?
Common mistakes include not checking local zoning laws, skipping the property line check, using inadequate materials, and neglecting proper post installation techniques.


