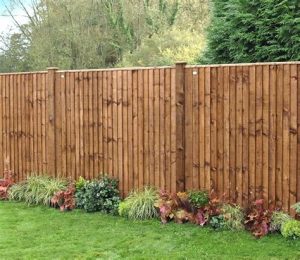
Are you considering enhancing your property with a vinyl fence? If so, you’re in the right place. Vinyl fencing is not only an attractive option for defining your space but also comes with numerous benefits, including durability and low maintenance. However, before embarking on your installation journey, there are several key factors to understand to ensure a smooth and successful process. From essential preparations and required tools to important considerations and common pitfalls, this guide covers everything you need to know about installing a vinyl fence. Whether you’re a seasoned DIY enthusiast or a first-time installer, our comprehensive step-by-step instructions and insights will equip you with the knowledge needed for a flawless installation. Let’s dive in and discover how to transform your property with a beautiful vinyl fence!
What Do You Need to Prepare for Vinyl Fence Installation?
Before diving into the installation of your vinyl fence, it’s essential to ensure that you have adequately prepared for the task ahead. Preparation not only helps streamline the installation process but also ensures that you achieve the desired results. Here are the key factors to consider:
- Planning and Permits: Check with your local authorities to see if you need a permit for installation. Confirm the boundary lines of your property and determine the exact placement of the fence.
- Utility Lines: Contact your local utility companies to mark any underground lines before you start digging. This is crucial for avoiding costly mistakes and potential hazards.
- Weather Conditions: Consider the weather in your area. Ideally, choose a dry day to install your vinyl fence, as moisture can hinder the materials’ performance.
- Materials and Supplies: Gather all necessary materials for the installation. This includes vinyl panels, posts, gate hardware, and concrete. Having these on hand before starting can save you time.
- Tools: Ensure you have the required tools, including a post hole digger, level, measuring tape, and saw. Refer to the Understanding the Tools Required for Vinyl Fence Installation section for specifics.
By addressing these crucial preparations, you’ll ensure a smoother installation process and set the foundation for successful vinyl fencing. Being well-prepared allows you to focus on the installation steps without the stress of unexpected issues.
Understanding the Tools Required for Vinyl Fence Installation
When it comes to installing a vinyl fence, having the right tools is essential for a successful DIY project. Below is a list of the tools you will need to ensure your installation is efficient and effective:
- Measuring Tape – For accurate measurements of your property line and fence panels.
- Post Hole Digger – Necessary for digging holes for the fence posts at the appropriate depth.
- Level – To ensure your fence panels and posts are perfectly aligned both vertically and horizontally.
- Rubber Mallet – Useful for securing fence panels without damaging them.
- Drill with Drill Bits – For making necessary pilot holes and securing screws or brackets.
- Screwdriver – To fasten screws that secure the panels to the posts.
- Vinyl Fence Panel Installation Tool – Simplifies the process of connecting panels to posts.
- Concrete Mix – To secure the posts in place once they are installed.
- Shovel – Needed for general excavation and soil removal when setting posts.
- Safety Gear – Always remember to wear gloves, safety glasses, and appropriate footwear during installation.
By ensuring you have all these tools on hand, you’ll be well-equipped to tackle your vinyl fence installation. Taking the time to prepare will help you avoid unnecessary frustration and ensure a smooth process.
What Do You Need to Consider Before Choosing Vinyl Fencing?
When it comes to selecting the right vinyl fencing for your property, several key factors come into play. Understanding these considerations will help you make an informed decision that satisfies both your aesthetic preferences and functional requirements. Here are some aspects to think about:
- Purpose: Consider why you need the fence. Is it for privacy, security, or decorative purposes? The function of the fence can significantly influence your choice.
- Style: Vinyl fences come in various styles and colors. Think about the overall look of your home and choose a design that complements your exterior.
- Height: The height of the fence can affect both its appearance and function. Ensure you understand local zoning laws regarding fence height restrictions.
- Durability: Check for the quality of the vinyl materials used. High-quality vinyl is crucial for a long-lasting fence that can withstand weather conditions.
- Maintenance: One of the benefits of vinyl fencing is its low maintenance. However, consider factors like cleaning ease and any potential repairs that may be necessary over time.
- Cost: Evaluate your budget. Vinyl fencing can vary in price based on quality and design, so it’s essential to choose an option that fits your financial plans.
- Installation: Determine whether you want to install the fence yourself or hire a professional. This may impact your choice of fence type and design.
- Warranty: Look for products that come with a warranty. A good warranty can indicate the manufacturer’s confidence in the quality and durability of their product.
By keeping these considerations in mind, you can make a more informed choice about your vinyl fencing, ensuring that it aligns perfectly with your expectations and requirements.
Step-by-Step Guide: What Do You Need for Effective Installation?
Installing a vinyl fence can be a straightforward process if you follow a systematic approach. Here’s a what do you need to complete your installation effectively:
- Gather Your Materials: Ensure you have all the required materials before starting. This includes vinyl panels, posts, gates, and necessary hardware like brackets and screws.
- Mark Your Area: Clearly mark the perimeter where you want the fence installed. Use stakes and string to visualize the layout and ensure you’re adhering to property lines.
- Prepare the Ground: Level the area where the fence will be installed. Remove any debris, rocks, or obstacles that could interfere with the fence’s alignment.
- Install the Corner and End Posts: Begin by placing the corner and end posts. Dig deep enough holes (usually 2-3 feet) to ensure stability. Use a post level to keep them straight.
- Connect the Line Posts: Once the corner and end posts are secured, install the line posts at equal intervals based on your fence layout. Make sure they are flush with the ground.
- Attach the Panels: Start attaching the vinyl panels between the posts, ensuring they are aligned properly and evenly spaced. Use brackets and screws to secure them in place.
- Install Gates (if applicable): If your design includes gates, install them according to the specific manufacturer’s guidelines to ensure proper functionality.
- Finalize the Installation: Once all panels and gates are installed, double-check the alignment and level of the entire fence. Make any necessary adjustments.
- Clean the Area: Remove all tools and leftover materials from your workspace. This ensures a tidy finish and helps you avoid accidents.
By following this what do you need guide, you can achieve an effective vinyl fence installation that is not only functional but also enhances the aesthetics of your property.
Common Mistakes: What Do You Need to Avoid When Installing?
When it comes to vinyl fence installation, avoiding common pitfalls can save you time, money, and frustration. Here are some critical mistakes you should be aware of:
- Inadequate Planning: Failing to measure the area properly and not having a clear layout can lead to misalignment and improper spacing.
- Ignoring Local Regulations: Not checking local building codes or homeowners association guidelines before installation can result in costly fines or removal.
- Poor Quality Materials: Choosing low-quality vinyl or components can compromise the durability and appearance of your fence.
- Skipping the Base Preparation: Not properly preparing the ground can lead to uneven ground, which affects the stability and appearance of the fence.
- Over-tightening Panels: Over-tightening the panels can lead to cracking or warping, reducing the fence’s lifespan.
- Neglecting Drainage Issues: Installing a fence in an area prone to standing water can cause damage over time, so ensure adequate drainage before starting.
- Not Following Manufacturer Instructions: Each vinyl fencing product may have specific installation guidelines, and ignoring them can lead to issues down the line.
- Failure to Account for Expansion: Vinyl can expand and contract with temperature changes, so be sure to leave necessary gaps for this movement.
- Underestimating Time and Resources: Many new installers underestimate the time and resources needed for proper installation, leading to rushed jobs.
- Improper Use of Tools: Utilizing the wrong tools or not handling them correctly can lead to mistakes or even injuries.
By being aware of these common mistakes, you can ensure a smoother installation process and enjoy the benefits of your vinyl fence without regret. Remember, proper preparation and attention to detail are key to a successful fencing project!
Frequently Asked Questions
What are the benefits of installing a vinyl fence?
Vinyl fences are durable, low maintenance, and resistant to weather and pests. They also come in a variety of styles and colors, making them an aesthetic choice for many homeowners.
How much does it typically cost to install a vinyl fence?
The cost of installing a vinyl fence can vary depending on the size of your property, the design of the fence, and labor costs, but generally ranges from $20 to $40 per linear foot.
Do I need a permit to install a vinyl fence?
In many areas, you may need a permit to install a fence. It’s important to check with your local zoning office or homeowners association to understand the regulations that apply to your property.
What tools do I need to install a vinyl fence?
Basic tools required include a post hole digger, level, measuring tape, saw, and concrete mix. Additional tools may vary depending on the specific fence design and installation method.
How long does it take to install a vinyl fence?
The installation time can vary, but typically a vinyl fence can be installed within one to three days, depending on the complexity of the project and the number of installers.
Can I install a vinyl fence myself, or should I hire a professional?
While it’s possible to install a vinyl fence yourself if you have some DIY experience, hiring a professional can ensure that the installation is done correctly and efficiently.
What maintenance does a vinyl fence require?
Vinyl fences require minimal maintenance—primarily rinsing off dirt and debris with a hose and using soap for tougher stains. Unlike wood, they do not need painting or staining.
